Pie – Amigurumi #54

It’s been a week since COVID-19 sent us all into hiding. So what did I do? Run to Michael’s, stock up on supplies, and start making plushies again!

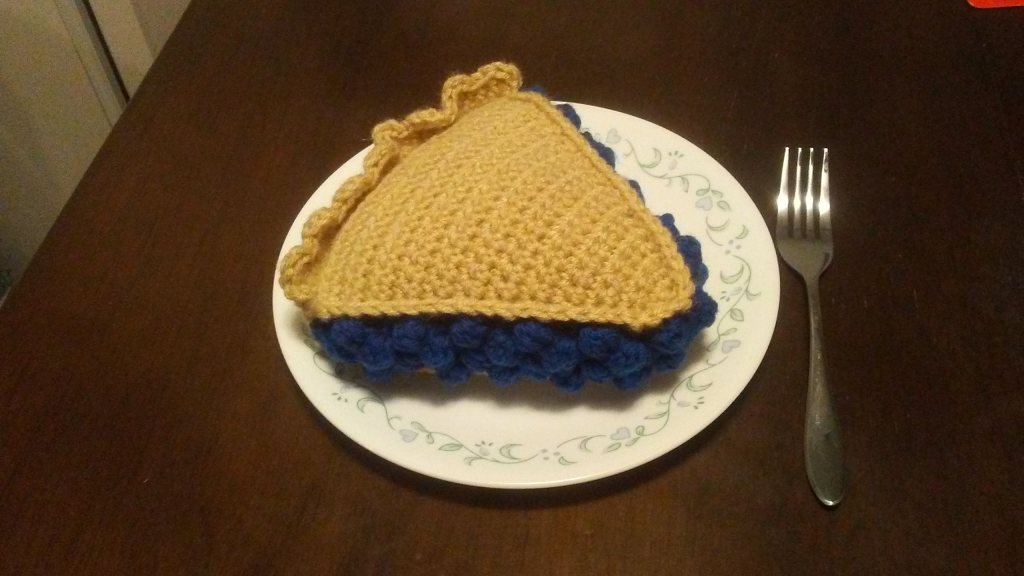
This pattern was created by Sherry Rohekar on Ravelry. The original pattern made a cherry pie, with a suggestion for blueberry pie at the end. So here we are.

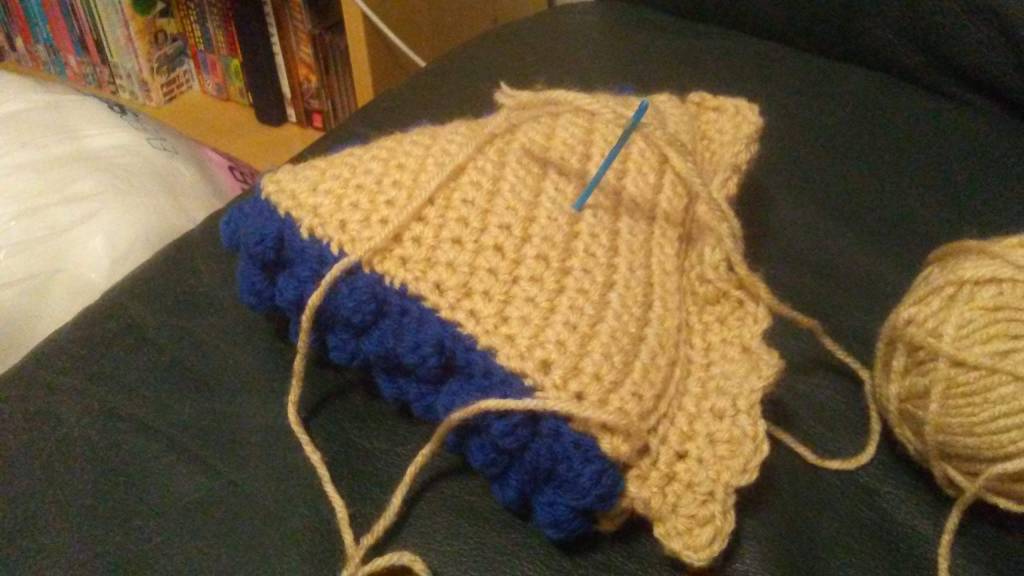
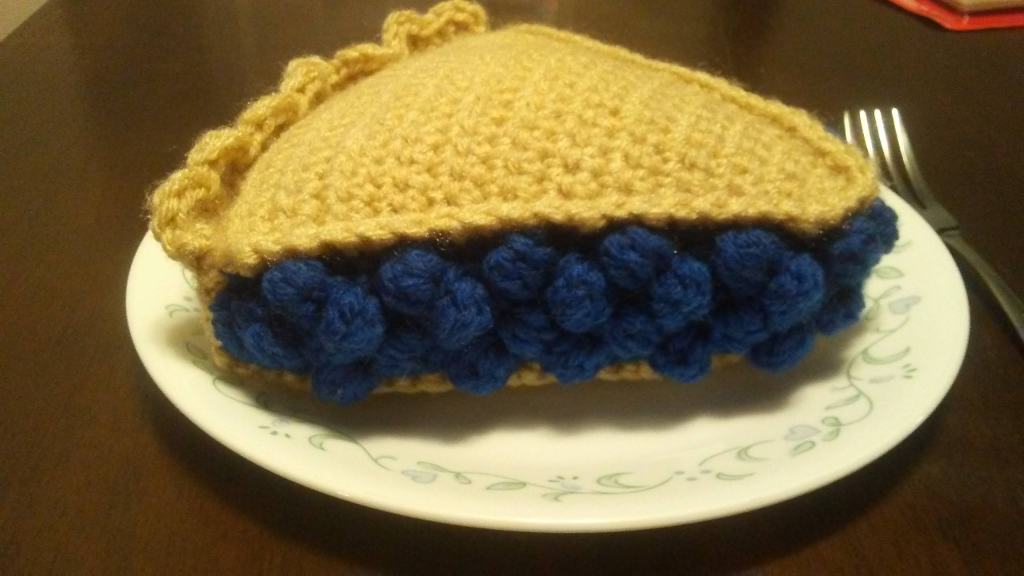
Before making the single crochet trim, the pie looked like this. On its own this isn’t too bad. If you are not confident in making the trim, you could probably get away with leaving it like this. I think the trim makes it look like the edges have been “sliced” from a whole pie, which is what you are going for. My slice ended up a little overstuffed.

The pattern said to make bobbles “every now and then.” I tried to keep the bobbles evenly spaced each row, and it ended up looking nowhere near as interesting. Not to mention all the bunching going on… indeed, just make bobbles wherever you find enough space.

Growing up, my family was never “pie” family. We preferred cakes and cookies. I only had homemade apple pie once, before I met Hatter. Shoonie was a wee baby shoon, and we made it as a kids’ workshop project at the local apple picking farm. Having only tried the jelly-filled hand pies from McDerp’s, my mind was blown eating actual warm, baked apple pie! Maybe I’ll try making a cherry pie from scratch this summer, once cherry season kicks in.

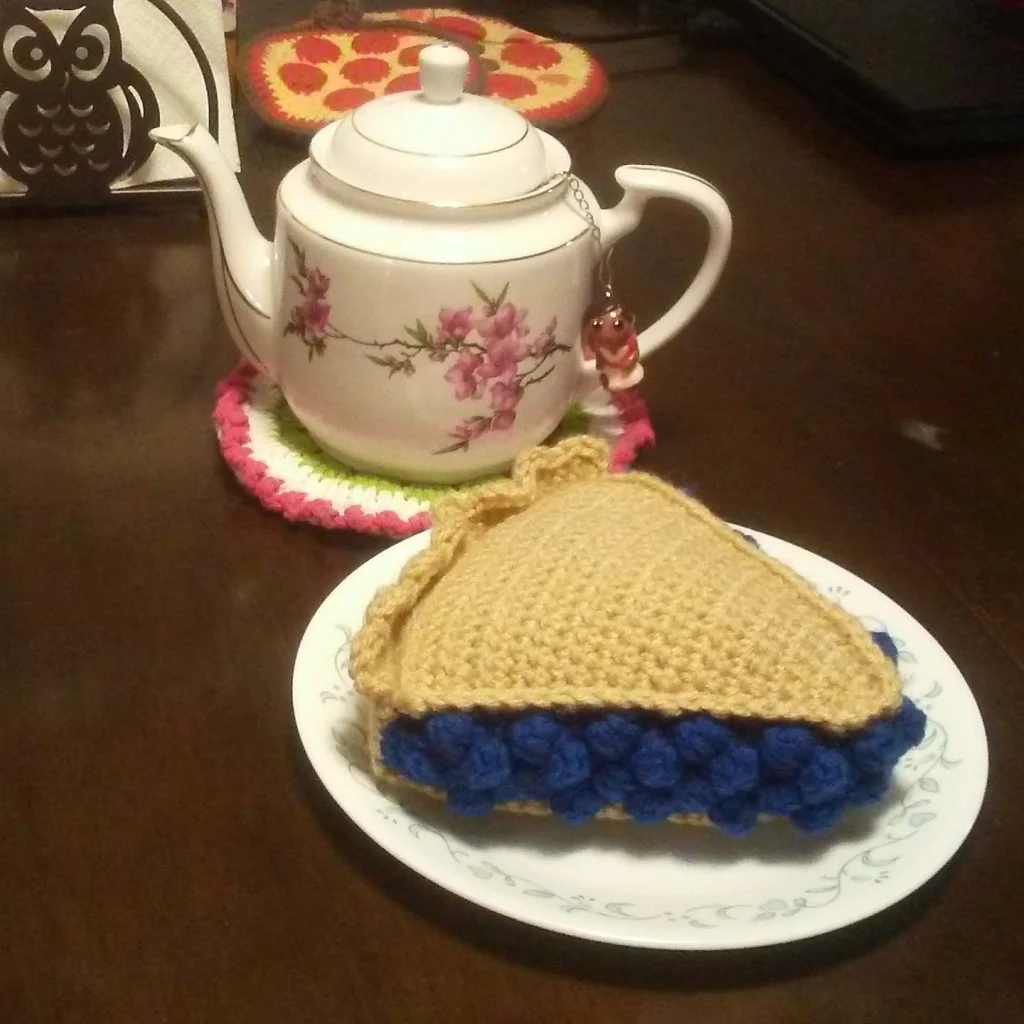
I like to eat pie with a nice cup of tea. Hatter said this pie looks cute, but tastes “pleh pleh pleh.”

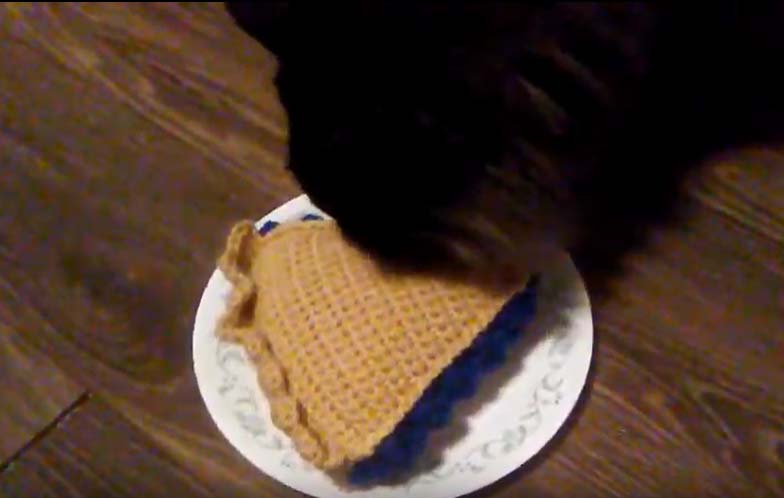
No-Face and Sootsprite liked it. As you can see they are enjoying the pie, and totally not just licking it because I put cat treats on the plate.

I meant to have this pie finished in time for Pi Day. And then we went into social isolation, which cancelled classes and due dates for this week.

Fortunately we had just enough time to have Pi Day, before isolation began. I made actual pies!

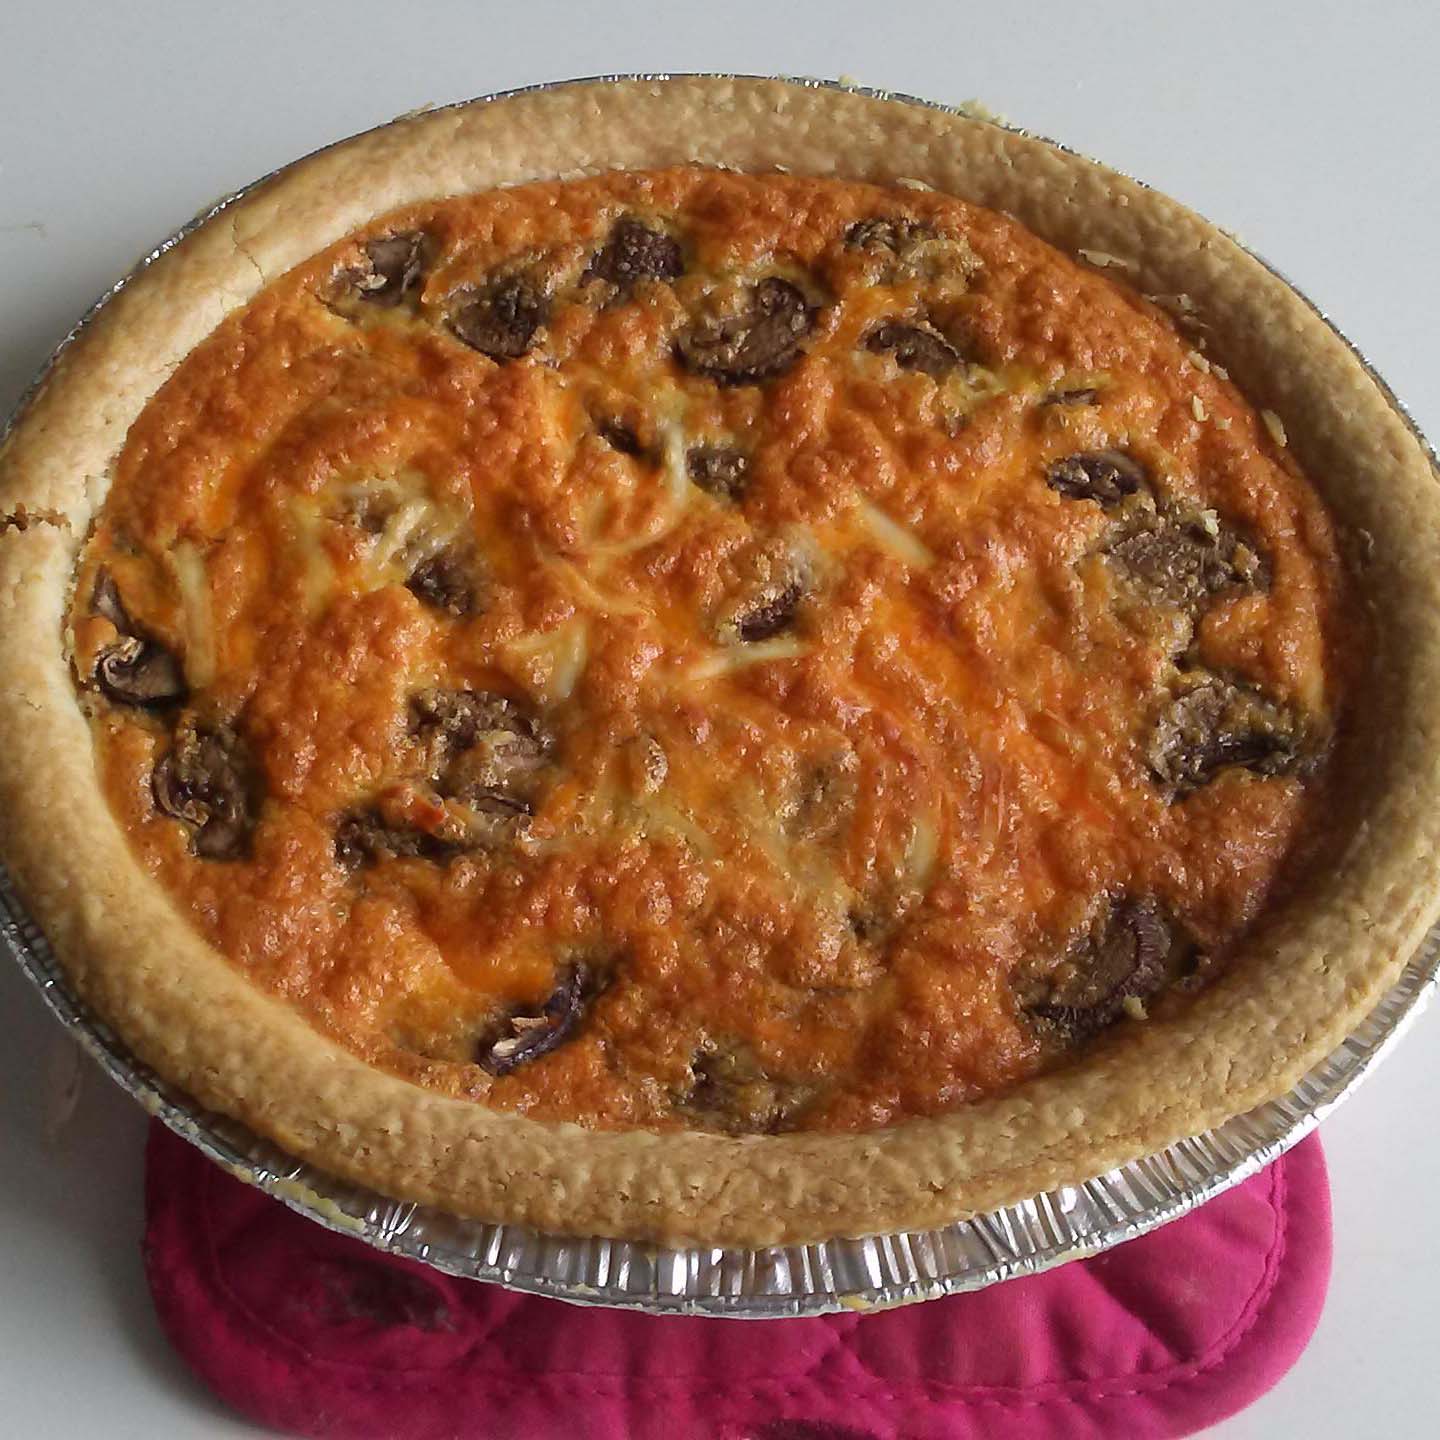
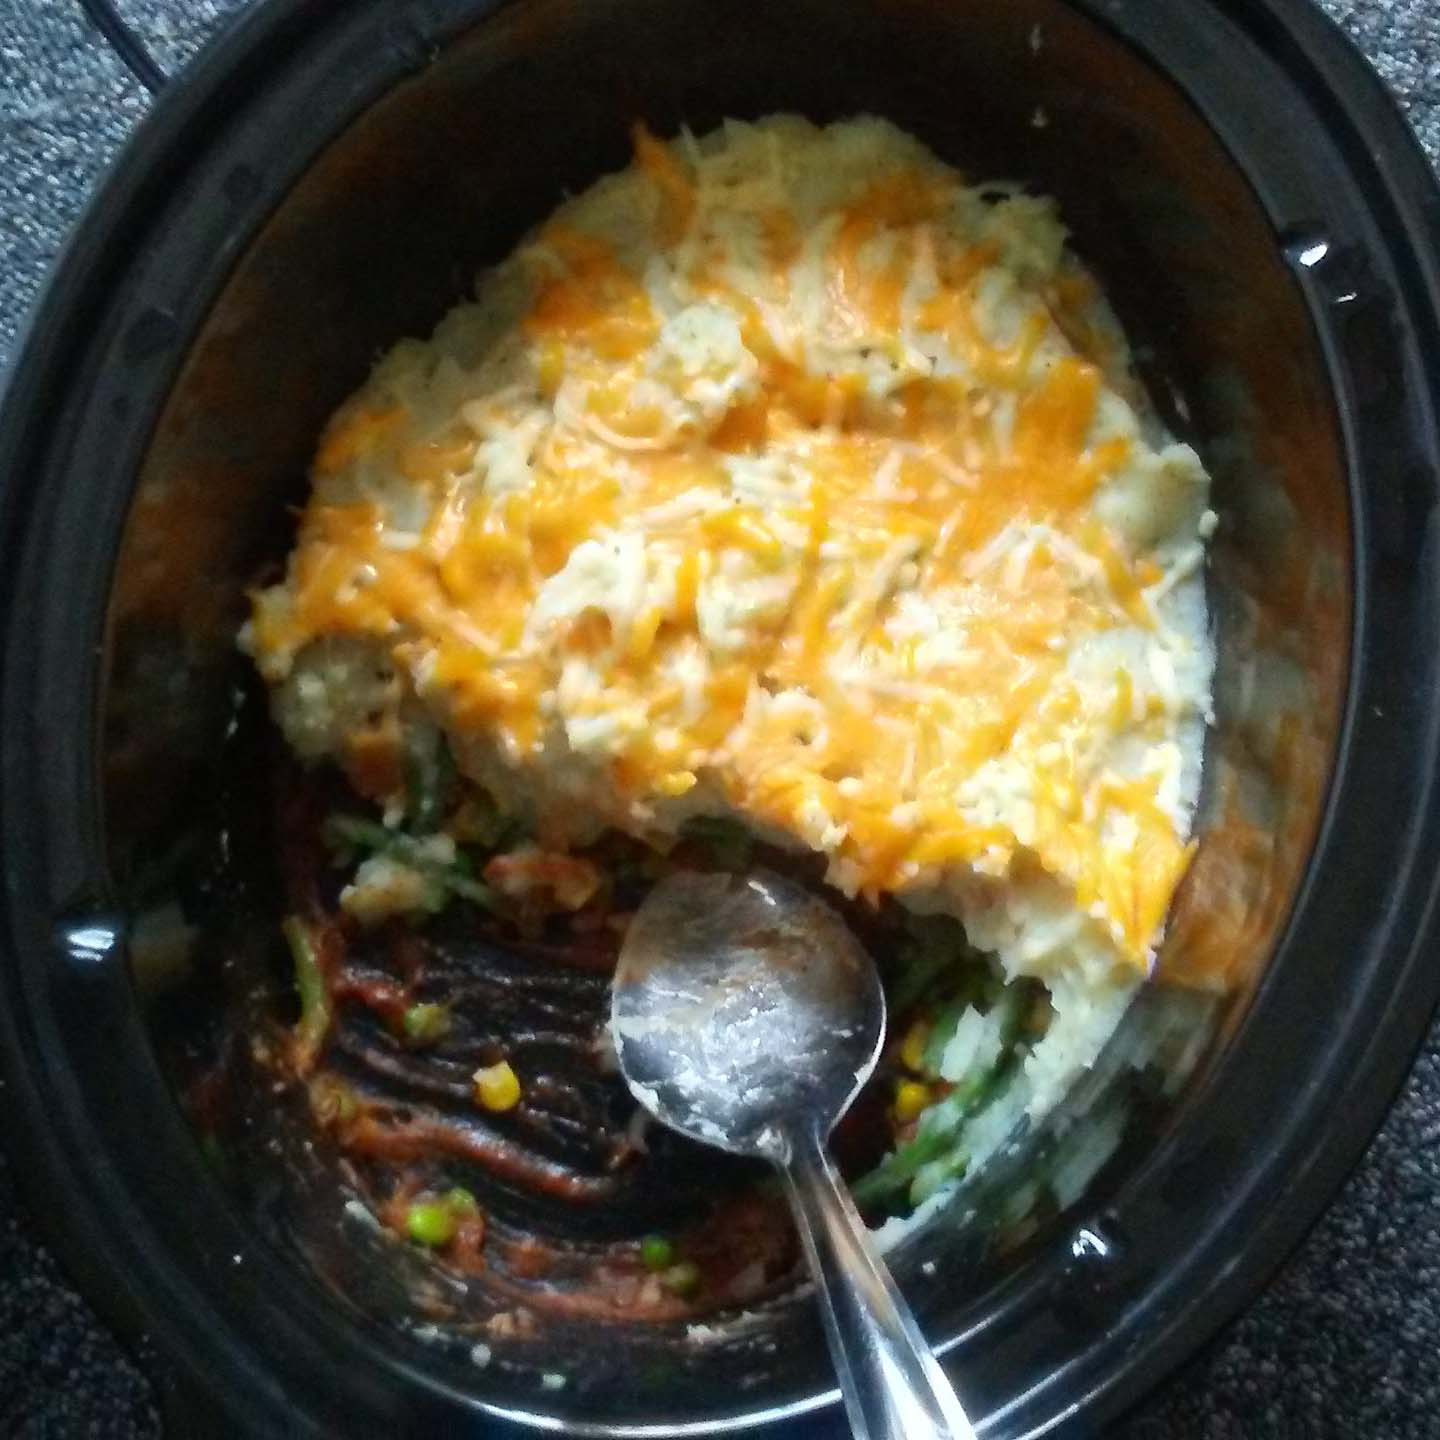
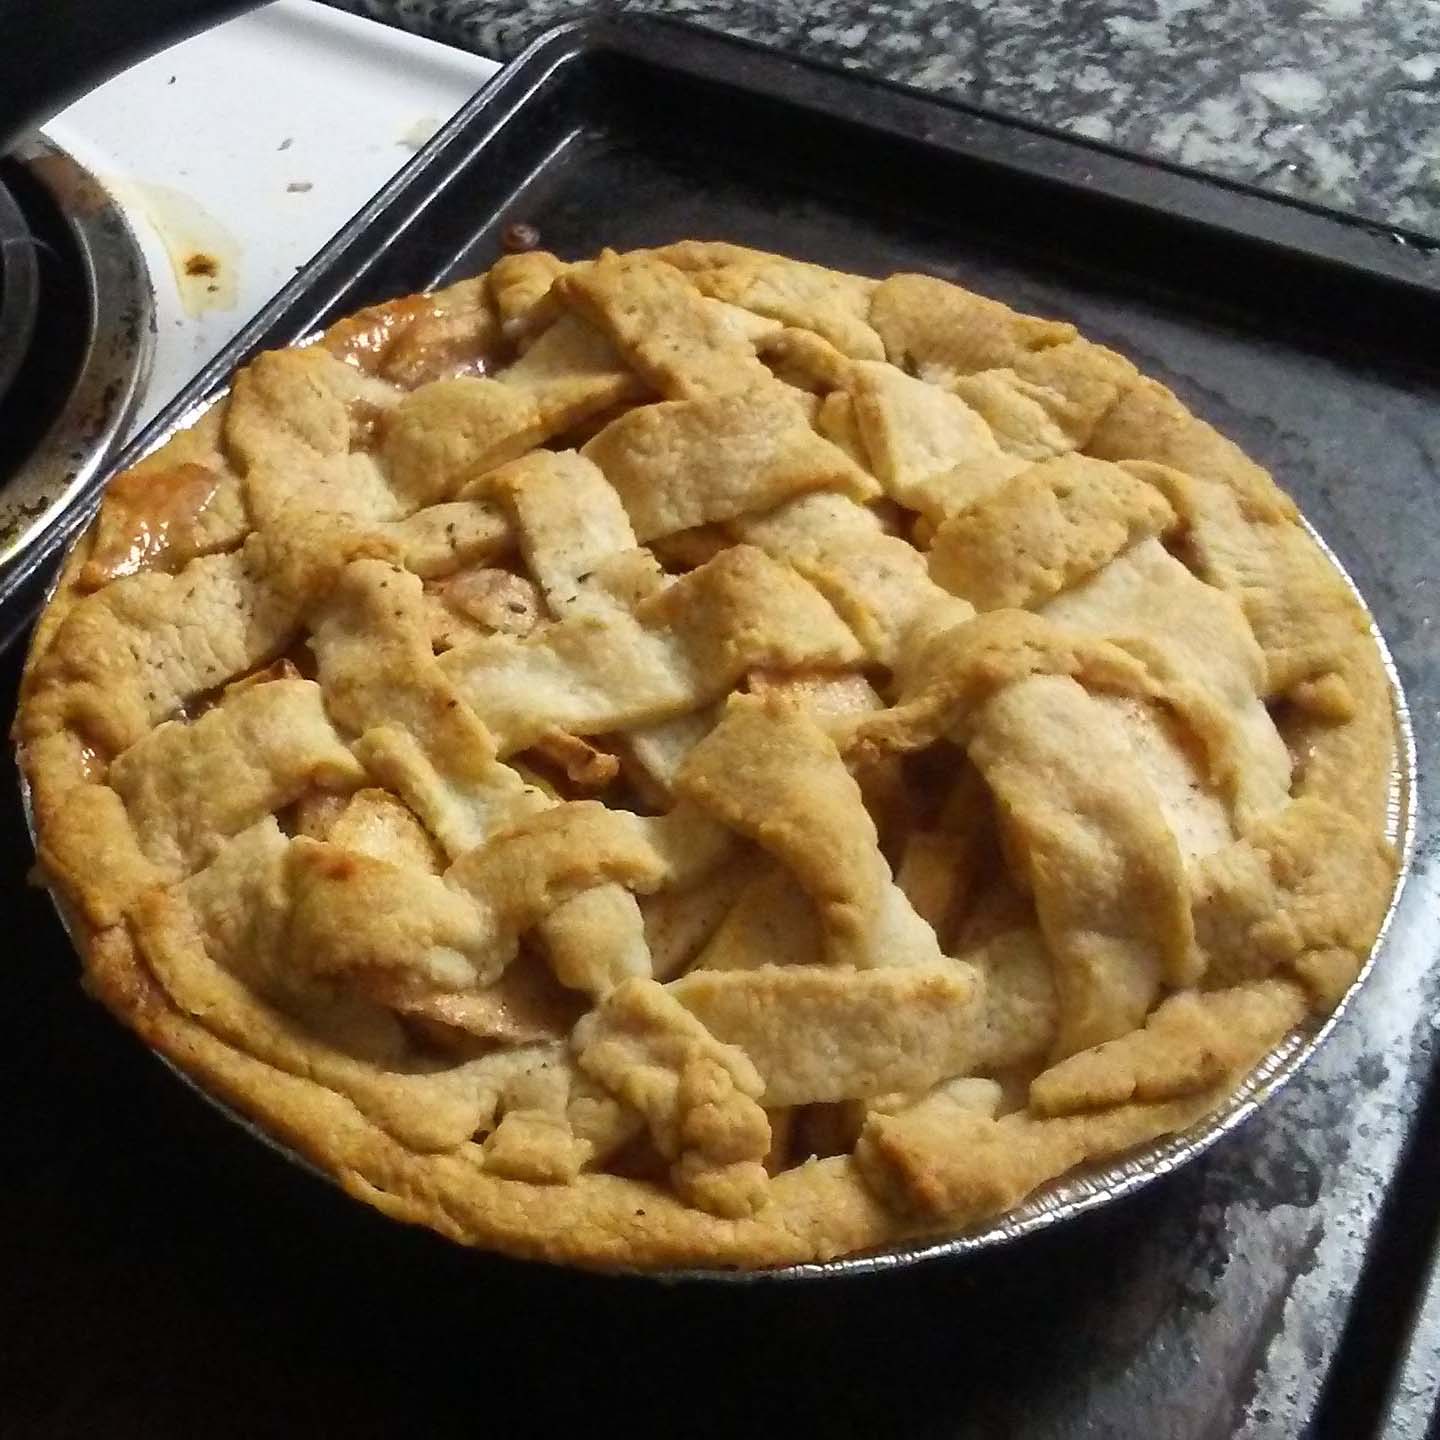
Clockwise from top left: bacon and mushroom quiche, Shepherd’s Pie, apple pie, and chocolate ganache tart. I spent all afternoon slaving away at these, but it was worth it to see so much gone by the end of the night. Some folks even took leftovers home!

The apple pie was the most intimidating because of all the apple peeling and lattice arranging. Which is why I got Hatter to do those things. 😀 I didn’t have nutmeg, so I substituted a secret ingredient. But it’s secret, so I won’t write it here. Don’t worry, rest assured it’s safe to eat. I just kept it secret from folks who might oppose it.

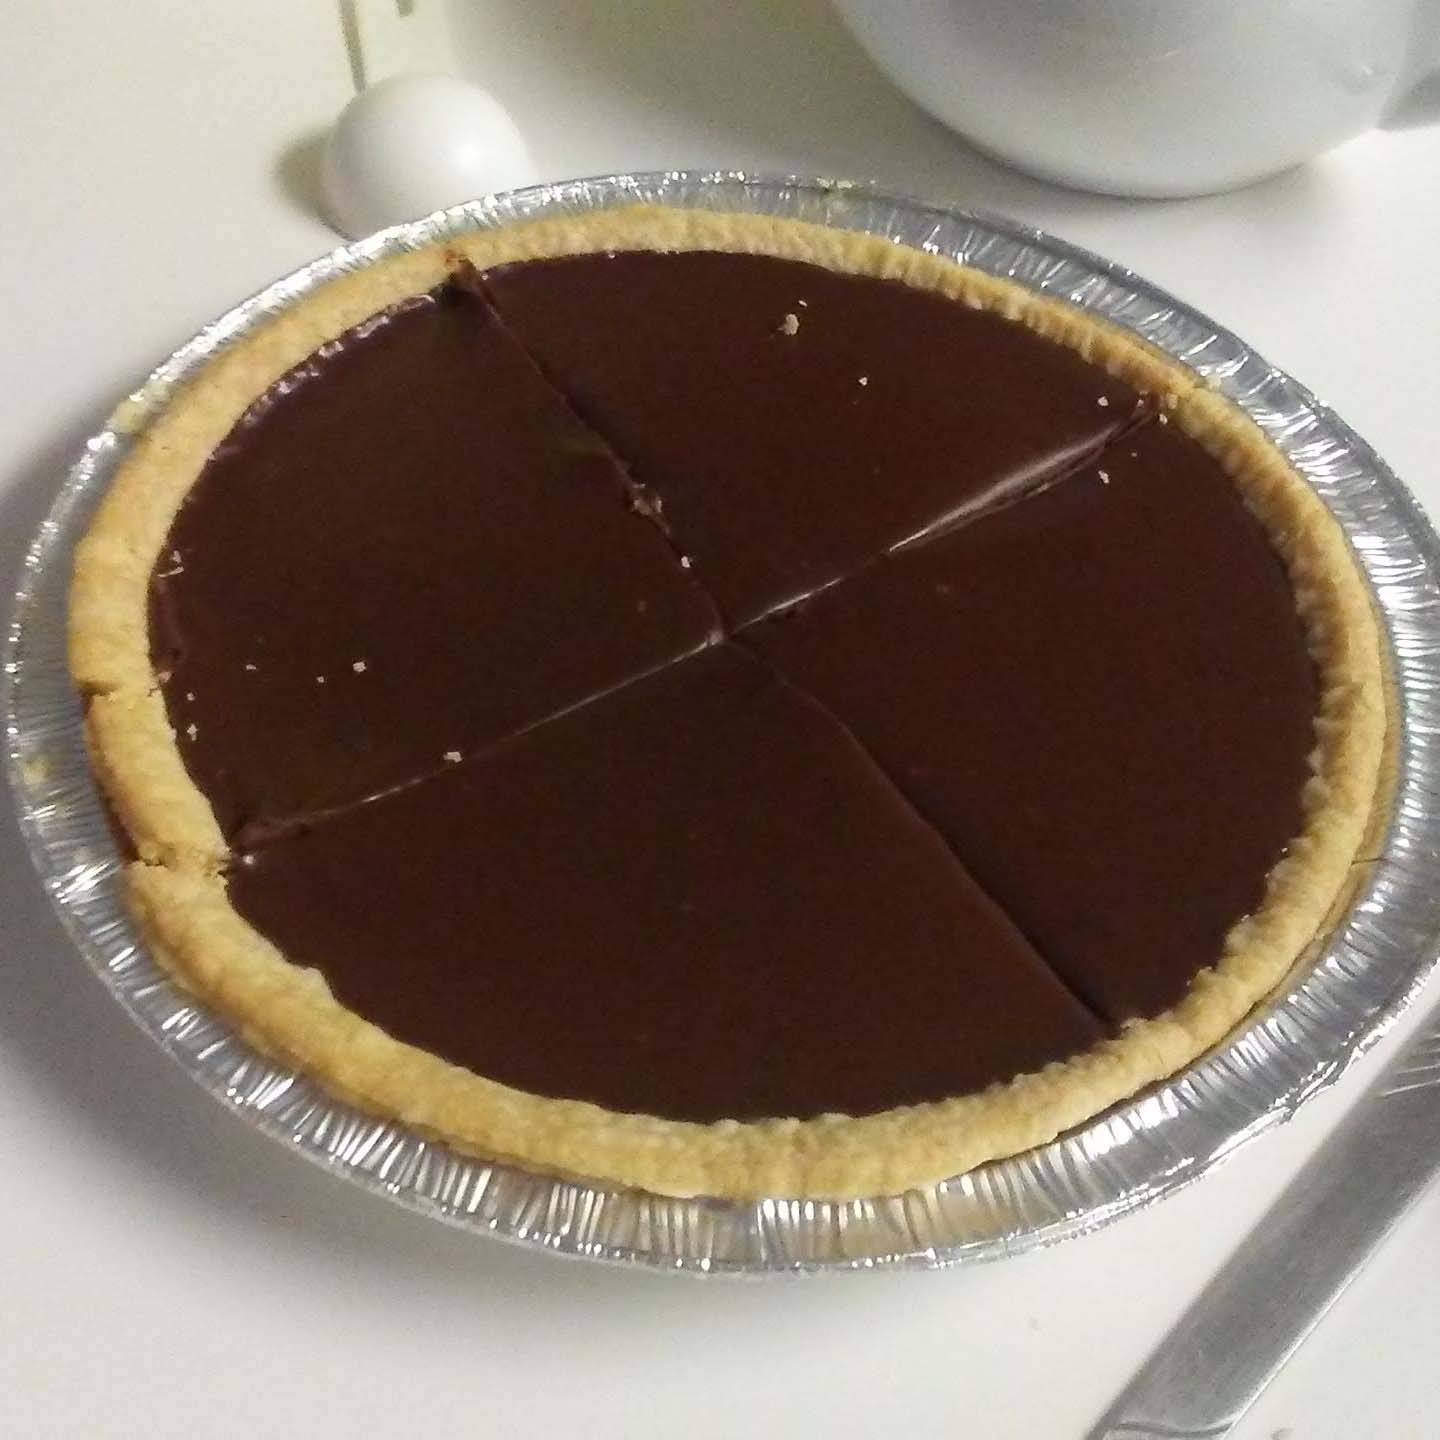
For the ganache tart, I used Chef John’s pots de creme recipe minus the coffee, poured it into the pie shell, and stuck it in the freezer for an hour. I was happy with how this turned out, because it was what I expected of a chocolate tart. Previously I made a chocolate pie, but found it too sweet and not at all like the silky, dark chocolate ganache I love. Hatter liked it, but I think a ganache tart is more of my taste. For best results, try it with a scoop of vanilla ice cream. The taste and consistency reminded me of a popular ice cream chain’s cakes.

Baking all these pies, and being able to serve guests has boosted my confidence. Next, I want to make a key lime pie; real, and crochet. Mmmm….

It sucks to be isolated. But think of it this way: now you don’t have to share your pies! Here are some links to patterns and recipes, to keep you entertained:

Cherry Pie crochet pattern by Sherry Rohekar
Quiche recipe from Sally’s Baking Addiction
*Slow cooker Shepherd’s pie from Taste of Home
Apple pie with lattice crust from the Tenderflake official website
Chocolate mocha pots de creme by Chef John

*You can make this in the oven too. I used the slow cooker to save on oven space.

What other pies do you like? Comment below!

Pika, so happy~

Umbreon – Amigurumi #31

At long last, another ami! This was made from a pattern by Wolfdreamer Off The Hook.

I’ve finished watching Inu x Boku: SS. It’s a nice, light series you can watch while doing something else. It’s kind of like Fruits Basket, but instead of animals, they turn into supernatural beings. And why not set the mood with a dark-type Pokemon? It’s Umbreon!(Click image for pattern link)

IMG_20160917_224532540.jpg

Oof. This turned out a lot bigger than it looked. Guess I missed the part where it said the ami would be approx. 8 inches. I attempted to work on this during the trip to FanExpo, but fat lot of good that did. The yellow felt was a much darker shade than the yellow yarn used on the ears and tail, so instead I made crochet rings. I ended up gluing them anyway, due to laziness. u_u

It can stand on its own pretty well.

IMG_20160917_161950253.jpg

Pondering life

img_20160917_194656318-1The shape of the head and body give me an idea for future Eevee-lutions. Have you noticed that all the -lutions have the same general face shape, while Eevee has a chubbier, more square-shaped face?

I hope Pokemon Go will be successful enough, to include gen 2. Umbreon is a solid evolution, but Espeon is cute too. Anyone else here still not have the update? *raises hand*


Ah… smart, half-asleep Val broke the yarn needle again. That meant poor Umbreon was just bits and pieces until we finally heaved the mattress.

Unfortunately, we were too late to submit Umbreon to Knitting and Crochet’s August Contest. Though I doubt this would’ve gotten very far (ain’t nobody got time for 10 deviations…) but it was still nice to finally post an ami after so long. Plus, it doesn’t feel right to submit a pattern I didn’t create. Maybe we can try making smaller versions of the other -lutions?

Oh my goodness… this is happening in Texas now. How exciting! Someone in Texas is also making the world plush. Poke-plush, to be exact. I wonder if we could bring this to Ontario?

img_20160917_224956013

Skinny legs club

What’s your favourite Eevee-lution? Or do you just like Eevee? Comment below!

Pika, so happy~

Boot Cuffs – DIY #5

Happy New Year 2016! You may have read the blog posted on December 30, 2015. I posted a reply to that blog on Sunday, which you can read here.

It’s time to start the new year off right: with some much anticipated craft posts. Whatever your reason for lack of motivation, completing quick ‘n easy projects get the creative juices flowing again. Now that we finally have snow and winter chill, why not try making these boot cuffs?

IMG_20160106_121400

50% of girls on social media have a picture like this. 100% of those girls think it’s artsy. That being said, I call this one, “Waiting for You.”

Here is the tutorial I followed:

For this project, I used the now-discontinued Bernat BlackLites yarn in Cherry Chill. I also possess a ball of Cowboy, which I would like to use for longer cuffs.

Bernat BlackLites in Cherry Chill, left, and Cowboy.

Bernat BlackLites in Cherry Chill, left, and Cowboy.

If you already know how to knit, this project should be a breeze. Your fingers are the knitting needles!

The girl in the video cast onto her dominant hand, but I started by casting onto my non-dominant hand. I found this easier, because I could count the rows as if they were on regular knitting needles. The first row is the “right side,” while the second row is the “wrong side” in stocking stitch.

Regardless of the size of your calves, 20 rows should be enough to wrap around. Thanks to the wide stitch, you don’t need to make buttonholes! I made the buttons using a smaller crochet hook than the yarn’s recommended size. They measured about 3/4″ (2 cm) in diameter.

IMG_20160102_235136505IMG_20160102_235149024

boot socksFinal Verdict: My boots have never looked so stylish! And my calves are nice and warm, without having to wear baggy pants. I want to make more cuffs, using actual knitting needles next time.* I wonder if they could be worn long, like the ones on the right?

Humph. The yarn became frayed. No wonder it was discontinued. Still, I like the colour design of black mixed with red, white, and pink. Here’s to hoping the blue ones will look great, too!

I finished my first pair, the night before seeing Kitty and Bear. That almost rhymed.

The next few months will be quite a challenge. Not only will I be returning to school, but I will return to school AND work a part time job at the same time. It may not be so bad, though it means M and I will have less time to chat and hang out. But at least we will have time in between classes for lunch. This week, we went skating and ate chilli. For all the bad luck I’ve had so far this year, it’s reassuring to have a positive M at my side. M says I worry too much.

IMG_20160106_125611376

Staying warm, on and off the ice!

Top: Finger knitting, 8 sts cast on. Bottom: Size 11 needle, 16 sts cast on.

Finger knitting, 8 sts CO vs. Size 11 needle, 16 sts CO.

*After a bit of experimenting, I discovered that swapping to knitting needles may not be such a good idea. Finger knitting creates wide, open stitches, while size 11 needles (the size recommended on the yarn label) create tighter stitches. My fingers ended up creating stitches twice as wide as the needles!

You can design a needle-based pattern for long cuffs using this pattern. Simply multiply the rows you worked in finger knitting by 2. For example, the video tutorial showed 20 rows. 20 x 2 = 40 stitches cast on. From there, work until the cuffs are as long as you like. Make button holes as you see fit.

The adjustable stitches mean that the excess will stick out. Try adding a third button, beside the top button, to keep things in place.

And so ends the first official craft post of 2016! What other crafts and DIY would you like to see here? Have you tried making winter accessories for friends, or family, or yourself? What projects would you like to complete this year? Comment below!

Pika, so happy~


Nyan Cat Headband – Amigurumi # 27 / DIY #4

Yes, I am counting this as an ami.

IMG_20150927_131850994

So this project took longer than necessary. I originally tried knitting this headband and changing the colours vertically. It looked great at first, but it quickly became a nuisance with all those colours getting tangled and shifting apart. I finally gave up and ripped it out. Summer was starting, so I didn’t bother with it again.

Until now. Oh Moogly, bless you and your blog.

Moogly posted this blog with links to 10 free headband patterns. It just so happened #8 was perfect! The band is worked horizontally, and has a cute cinch in the middle that makes it look more like a giant bow. And the “wrapper” to cover the cinch looks just like Nyan Cat’s body! Time to bust out the colours once again.

IMG_20150927_135536

Boo!

This headband was super easy and fun to make. Now that we’re getting into fall weather, this band will be great for keeping your ears warm and your hair in place, without the bulk of a hat. If you tend to work slowly, start now so you’re ready for the full cold blasts!

You can also try variations of Nyan Cat:

Next project: get better quality pictures.

Do you prefer hats, headbands, both, or none? Do you like original Nyan Cat? Tac Nayn? Taco Cat? Comment below!

Pika, so happy~

OMG DOUBLE FEATURE!!!

So I’ve missed last week, and the week before the last post.

You: “What does that mean??”

It means we’re doing extra fun stuff this weekend!

Now that it’s September, we’ve succumbed to the dreaded bipolar weather patterns. This week has been comfortable, but last night was freezing cold! And just last weekend was cold and rainy. Either way, it’s time to bust out the layered outfits. If you don’t go out much, chances are you have stuff in your closet that no longer fits, but it stayed in said closet because you forgot it existed. This became the inspiration behind the dress I wore yesterday.

I don’t remember where this dress came from, but I do remember how old I was the last time it was worn: 12 years old. Imagine all the other girls your age dressing in sexy spaghetti strap and halter dresses, yet there you are looking like your favourite doll from when you were 6. I stowed this dress in my closet and never wore it again. As for why I still haven’t given it away? See above.

I like the light, airy fabric of the skirt, but could do without the huge collar and puffed sleeves. And I wanted a new outfit for a date with M yesterday, so figured why not. Let’s help this dress grow from a self-conscious tweenager to a self-confident twenty-something!

Before vs After

Before vs After

Let’s assess what we have to work with here: the dress looks like it has two layers, but it’s actually sewn in one layer. The dress has a zipper at the back to account for the closed collar, and ties at the back to make the dress more fitted. It also has a nylon cord in the front, to lace up the bodice. While it will waste less fabric, it will also require a lot more time to detach the white parts of the dress.

rip

We begin by turning the dress inside out to find the seams. Then we’ll take out our lovely eye goug–er, I mean seam ripper, and rip out the sleeves. As always, you can simply cut them with scissors. I like to seam rip, so as to waste as little fabric as possible. Seam ripping also leaves the bent edge, so you only need to fold over once more to create the perfect, fresh seam. Once that’s done, repeat the ripping process for the collar. I wanted to keep some lining underneath, so I marked the part of the white body piece that will be covered by the floral dress. We’re not going to seam rip anything below this line.

I saved the collar to make a necklace. This will add interest to a baggy, plain sweater. Just in time for fall!

Halfway done! Hem and iron out the edges.

Finally, I tried on the dress. It feels a bit long, but I’ll let M decide what he thinks of this length.

Ne-ne~ Simply by removing the sleeves and collar, we have a comfortable sleeveless dress! Pair this with solid coloured accessories, and you’ve got the perfect end-of-summer date night outfit. 12 year old Pika is very happy.

Part 2: Delicious Eats with M

This next part is a great date idea: cooking lunch together! M loves cheese, I love chilli, and so we made chilli mac n cheese. He has stories about his grandma using a whole block of cheese in her homemade mac, but for my tummy’s sake we’re going to use a small bag of shredded cheddar. Click here for the recipe we used.

M cut the onions, while I stirred the meat. We used the whole box of macaroni, because M started eating the noodles raw. XD I’ll admit it doesn’t taste bad, but it feels weird to eat uncooked macaroni. It feels like a cross between a corn nut, and a plastic tube breaking in your mouth.

*A tip on cooking mac n cheese from scratch: if you make the noodles seperately, don’t add all the cheese right away. As you take servings, add cheese accordingly. If you add all the cheese right away, leftover mac will become dry and gross.

IMG_20150919_125754

You drooling yet?

Final verdict: amazing! This is the perfect comfort food, all right. Too bad we didn’t have any garden salad on the side. I filled up a huge plastic container for M to take home.

I got two phone calls during this date, both from people I actually care about. It may not seem like a big deal, but when you typically text instead of call, this is quite a treat. M talked to both of them. XP Until it was time for dinner, M and I cuddled and watched Rick and Morty. It reminds me of a cross between Doctor Who, Adventure Time, and South Park. I should finish watching Archer… Man, it’s hard living with your parents. It’s annoying when you just get comfortable while watching a great show, and then all of a sudden you hear, “don’t sit like that, it’s bad for your back! You’ll walk with a hunch!” “Why you’re watching this? This is not a good show!” “Instead of watching TV with your guest, come help me!”

( – _ – );

We went to dinner with Kitty that evening. When he saw M, Kitty’s like, “HOMG, M!!! HI!!! NICE TO FINALLY MEET YOU!!! <3” They were bros. It’s blurry, but this is an immortalization of my favouirte memory from yesterday: walking to dinner with my BF and BGF. (Best guy friend) Peck Peck asked, “why does that guy on the right (M) look like he’s from Brokeback Mountain? XDDDD” (- _ -); Humph. M if you’re reading this, don’t worry, I still think you look handsome. :3

IMG_20150919_191210530

Kitty and M

I tried Steak and Kidney pie for the first time. It was pretty good, albeit very salty. Think of a chicken pot pie, but instead of chicken it’s beef. And no, the “kidney” doesn’t mean kidney beans. If you know what liver tastes like, kidney tastes the same. I for one am not a huge fan of either, but I give it 7/10. The pie came with mashed potatoes, but the waitress forgot to bring the potatoes, so I got free dessert! Wot wot~ I felt awful for undertipping; to the waitress at the Black Dog Pub, I promise you’ll get a better tip next time! Here is the free key lime pie, a perfect end to a perfect day.

IMG_20150919_203528

Sometimes, you come across a person who just makes you feel great. Sure you felt great before you met them, but this “greatness” is different. You want to improve for them, you want to make them happy, and in return they make you happy. You want to share the most important parts of your life with them, whether it’s going out to your favorite restaurant or introducing them to close family and friends. I know it hasn’t been a long time, but I’m looking forward to many more memories with M. I can’t wait to cook new dishes with him, go on new adventures, and cuddle with him again. ❤

How’s September starting out for you? Any cool new changes this year? Have you repurposed or upcycled any of your old clothes into new outfits for this year? What do you like in your mac n cheese? (If you say “green peas,” we can’t be friends) Comment below!

Pika, so happy~

Pika’s Soba Noodle Soup!

“Hey Pika, where have you been all month?” – Nobody

Regardless of the length of summer vacation, everybody seems to wait until August to do the really fun things. Maybe it’s because the weather evens out by then, maybe it’s because they spent July saving up money for August frolicks, but whatever the reason, August is the time of all the fun things. Case in point: I just got back from Washington, DC. I saw the Washington Monument and the Lincoln Memorial, two landmarks that I’d only seen in movies and TV shows. On the way back, we did some shopping in Grove City. Shoonie got a little green bow. BOW!!! |>o<|

And today… just feeling bleh. How to describe the feeling… it’s when you have more on your plate than you thought. Or when you take work with you on a trip thinking you’ll get it done, but you don’t because it’s a vacation. Or when you miss somebody. Or you remember the red Navi is coming soon. Whatever it is, it can be temporarily healed with comfort food!

Guess what I bought today? Soba noodles! These are Japanese noodles made from buckwheat. The ones I bought come in a pack of 6 individually wrapped bundles. Each bundle makes one serving of noodles. Genius! Why can’t we package spaghetti like this? In Harvest Moon: Tree of Tranquility, you can cook buckwheat noodles with egg. That was the inspiration behind this improvised recipe, along with my Naruto-esque love for ramen. So, without further ado, let’s get comfort cooking!

IMG_20150829_204209

Ingredients

IMG_20150829_2013115901 bundle Soba (buckwheat) noodles

2 cups water

1 chicken flavoured bouillon cube

1 egg

2 sticks of imitation crab

Chopped chives for garnish

First thing’s first, boil the water and dissolve the cube to make your soup stock.

IMG_20150829_201710Crack the egg into a bowl and beat lightly. Set aside.

IMG_20150829_203043Then, take a bundle of soba noodles and pop them in the pot. Do not break the noodles! These are soba noodles, not spaghetti. They may look like cardboard, but they cook in about 5 minutes.

IMG_20150829_203423Meanwhile, chop up your imitation crab into bite size pieces. I don’t care what people say; imitation crab is tasty and convenient. But if you would rather have stronger tasting protein, you can substitute the imitation crab for ham, hot dogs, bits of cooked chicken or beef, or tofu if you’re an alie—-er, I mean vegetarian. 😀 Whatever you decide to add, make sure it’s cooked. This way you can simply toss it in to thaw and warm up.

Pour the beaten egg into the noodle soup, stirring constantly to disperse the egg. Look familiar? If you frequent Asian restaurants, it should; you’ve just made egg drop soup!

IMG_20150829_203718

Finally, add in your chopped crab meat. Turn off the heat and let the soup “rest” for about a minute before serving.

Pour into a bowl, top with a few chives, and you’re done!

Final Verdict

Tasty and comforting! This is a very versatile soup. Don’t like crab? Try ham. Think egg drop looks gross? Maybe poached is more your style. I think next time, I will try a meatless approach by substituting the crab for sautéed mushrooms, and instead of egg drop just hard boil and slice the egg.

Eww… these noodles turned out a bit slimy. I guess that’s why the package said to rinse the noodles after cooking. Basically, cook noodles separately, drain, rinse, and add to prepared broth. I wish I had read this blog post before hand. Also beware, egg drop soup does not keep well. It will leave a gritty feeling in your mouth when eaten cold, and congeals the next day. Bring a friend, or at least a large appetite!

I would definitely eat soba again, and in different ways. I said before that these are not spaghetti, but maybe I will try using these noodles instead of spaghetti sometime.

Have you tried soba? Do you eat your noodles with self-confidence? How do you prepare your soba? Comment below!

Pika, so happy~

Canada Day Pudding Party!

Edit: use only unsweetened milk for this recipe! Remember, marshmallows are just puffs of sugar. If you melt them into pre-flavoured milk (like chocolate milk) your pudding will turn out way too sweet. Use only unsweetened cocoa, or a tiny bit of your favourite flavour extracts.

Happy Canada Day!!!

I’ve been cooking up storms lately. And we can’t have food without dessert! Since today is Canada Day, here’s a light dessert to follow up your poutine, or provide a sweet complement your Tim Hortons’s coffee. (Man, our mainstream cuisine is unremarkable…)

Nailed it!

Nailed it!

One of my favourite types of dessert is pudding. (Custard, for people outside North America) Since I was a Pichu, I’ve tried all kinds of store-bought pudding brands, from the sugary sweet Snack Packs to the rich, $5 4-packs found in the dairy aisle. My favourite go-to homemade dessert is custard pudding, or creme caramel. I’ve made it for guests, and they always rave about it. Aunty Waggie makes it the best.

Let’s begin the summer with some super easy 3 ingredient pudding from ochikeron.

Matcha is green tea powder, and one of my favourite flavours when mixed with milk. Green tea mochi ice cream = yum num num. Sadly, I don’t have matcha powder, but I do have cocoa powder. Ergo, chocolate pudding, here I come!

IMG_20150630_215945244Ingredients:

3/4 cup milk

50g marshmallows (approx. 6 jumbo size)

1 tbsp. cocoa powder

Directions

Mix the powder with a bit of the milk. This will make it easier to incorporate.

IMG_20150630_220030231

Add in the rest of the milk and marshmallows.

IMG_20150630_220222769

Cook on medium-low heat, stirring constantly. The mixture doesn’t need to boil, it just needs to be hot enough to completely melt the marshmallows. You can help the marshmallows melt faster by cutting them into pieces.

IMG_20150628_175708133

Taken while making vanilla pudding

When it looks like this, you've got it!

When it looks smooth like this, you’ve got it!

Once all the marshmallows are fully melted, pour mixture into molds.

pour

Chill in the fridge for at least 2 – 3 hours, and then dig in!

IMG_20150701_135536831

Obby~

Makes 2 small servings.

Final Verdict

ASDFGHJKL;’ IT’S SO GOOD!!! The pudding is smooth, creamy, and not too sweet. According to the package, 4 marshmallows = 30 grams, so I used 6 marshmallows + 1 to make sure the pudding set. In the video, ochikeron added a lot of marshmallows and got very obvious foam on top. When you add more marshmallows, the foam is more likely to separate. The pudding also ends up thicker and less “jiggly.”

I wonder how this pudding would look in a glass dessert dish, topped with whipped cream. If I have to describe the taste and texture in relation to a store-bought pudding, this felt like a milkier version Danone’s dark chocolate “Danette” puddings. Taste wise, this chocolate pudding tastes exactly like a Fudgesicle. This gives me an idea for later in the month, when it REALLY gets hot out…

You have to be patient with this pudding: make sure it stays in the fridge for AT LEAST 2 hours. It won’t set if you keep poking at it! Due to its softness, the pudding separates from the mold fairly easily. That doesn’t mean it transfers well…

plop

Plop.

Serving sizes are very small, creating less than 1/2 cup servings after the mixture settles. This is the type of dessert to make when you have only one friend over, or you and the sweetheart don’t feel like going out. That would be a cute date idea: make these together, let them chill in the fridge while you eat dinner, watch a movie, and take them out after the movie to enjoy while chatting. You’re welcome, Internet.

*You can swap the cocoa and milk for any other flavours of your choice! The original recipe called for soy milk, but I used skim milk. If you want a creamier pudding, try heavier milk. How about strawberry flavoured milk? Use your imagination! I do not think this will work with condensed milk, because it is too sticky and heavy.

And of course, you can make plain vanilla pudding by simply omitting the flavour agent. Marshmallows are already vanilla flavoured, so there’s no need to add vanilla extract. Serve with fresh berries; who needs marshmallow dip?! I theorize that this white pudding would taste great if made with almond milk.

Nailed it!

Since it’s Canada Day, how about some maple syrup flavoured pudding? Skip the artificial stuff you use on pancakes and grab some 100% pure maple syrup. Or just buy some maple candies and decorate your pudding.

What other quick and easy recipes should we try? Did you make any cute patriotic snacks today? Comment below, and have a Happy Canada Day!

Pika, so happy, eh~

Let’s Super Mario!

E3 happened this week, so I bet you know what I’m going to talk about… Yoshi’s Woolly World!!!!

Well… yes and no. I’m going to mention my thoughts, and then get into what I really wanted to talk about.


I just sat watching all the yarny goodness. Then it cut to the rows upon rows of Yoshi plushies. I think, “oh man I could totally do that. I could make them all. I can make EVERYTHING. I CAN BE AWESOME!!!”

Life goal: Emi Watanabe.

I don’t consider myself a programmer, and my art skills could never compare to the artists in our class. But I can utilize my skills in a way that not everyone can. I was the only person in our class who could make plushies. It’s basically 3D modelling, but using craft supplies instead of a $3,000 modelling software.

Now let’s talk about this week’s real post: a throwback to the Super Mario themed plushies I’ve made. Or rather, the #LetsSuperMario contest they’re running over at Nintendo. It’s been 30 years since the first Super Mario Bros came out, and what better way to celebrate than by making a video in honour of the series? It’s for a good cause, too! Proceeds go to Operation Smile, a charity that offers free corrective surgery for children born with cleft lip. I won’t have time to make a video, but hopefully by spreading the word, someone reading this will be inspired to do so.

Anyway, let’s take a look at the plushies, shall we? All patterns are from WolfDreamer. Click on the picture for the specific pattern link.

Here’s one of my first successful plushies made from a pattern: the classic red mushroom. Man, is it derpy. Back then, I liked my work to be nice and smooth. That’s why I left everything on the wrong side. Problem is, when you leave the wrong side facing out, it distorts the shape and looks derpy. Past Pika, that right-side texture isn’t all that bad. You might even forget it’s there!

red-mashram

Iz mashram.

I improved a bit by the time I made the green mushroom. The spots sewed on correctly, too! But again, wrong side out because “SHMOOTH SHAILING LOLOL!” I like the colour of the blue mushroom.

Iz moar mashrams.

Iz moar mashrams.

These mushrooms are a fun project for beginners. Once you master those, you can make mini mushroom earrings.

Fire Flower! I always forget about this guy. It’s become such a permanent fixture on the lamp, I often forget it’s there. Yet the lamp looks weird without the flowers. Huh. I put a pipe cleaner inside the stem hoping it would hold its bend like the other flower, but that didn’t work out as well as I’d hoped. Oh well, it’s still cute.

fire-flower

We can’t have helpful powerups without enemies to avoid and/or defeat! I tried to squish the Goomba into a shape closer to the game. Maybe I should’ve actually jumped on him. I’m impressed with myself: I could amp up the lighting and contrast, put in my name and blog, and add the views side by side, yet I couldn’t ‘shop the stray thread in between his eyes. From here on, I preferred to glue felt, instead of sew.

boomba

I also made Toad and Toadette. They were Christmas presents for my then-sweetheart and his sister. Word is that Berry (his sister) was raving about Toadette. Sadly, I didn’t get a very good picture of Toad and Toadette before sending them off. You can look at WolfDreamer’s pattern for pictures; the finished plushies looked the same, except Toadette had both eyes open, and they didn’t have mouths. As a way of avoiding copyright infringement, I tend to not draw mouths on my plushies unless it’s an important part of the character’s design. I might try making and selling my own versions of these two.

And last but not least, Bob-omb. I made this one in a rush the night before some cute kiddos came to visit. One of them stuffed the mushrooms and Bob-omb in his shirt, and I said, “but now they’ll blow up!” He panicked and dropped them all. XP

bob-omb

And that’s it for now. Tune in next week when (hopefully) you can see the cutest, probably most difficult plushie I’ve made!

Once again, here are the main links:

Let’s Super Mario!

–> For more information about the beneficiary, visit Operation Smile’s official website.

Wolfdreamer Off The Hook

What was your favourite part of E3? Comment below!

Yoshi! Wa wa wa wa wa wa~

Bubble Tea – Dessert Days #6

Quick edit: fixed the weird crowding in the first few paragraphs. WordPress editing is not mobile-friendly.

*This recipe is by no means “authentic.” It’s just how I like to make it.

Today is my birthday! But since this weekend was busy busy, we celebrated last weekend (long weekend for us here in Canada) with bubble bubble bubble tea~ Maybe I’m just getting older, but it’s gotten to a point where physical presents just aren’t satisfying anymore. I would rather have big experiences, and take home a small token to remember it by. And well, since we celebrated me birthday a week early, as promised there is a special guest! From all the way in Penguin-ton, heeeeeeeere’s….. Shoony!

Shoony is on the left.

Shoony is on the left.

Okay, you’re sitting down for this next part, right?

Sit.

Hey, I see you standing!

Sit down somewhere, you’re holding up traffic!

Okay, good.

…Shoony has never had bubble tea before.

*wind blows the tumbleweed*

Here in Toronto, bubble tea is fairly easy to find. Most shopping malls around here have some kind of bubble tea/smoothie shop. A shop opened up near my school, and I went with Flash and Green Lantern after they had a big presentation. The shop also sells samosas. So really, it’s a matter of knowing which places sell bubble tea, since not every shop is “bubble tea only.” And no matter where you go, it always runs expensive. (Up to $5 for a small) For a few dollars more, you can swing by your local Asian supermarket, buy some instant tapioca pearls and flavour packets, and make many bubble teas the way YOU like!

bubble-teas

Store Bought vs. Home Made

For those who have spent the past few years under a rock without internet, bubble tea is a popular drink originating from Asia. I’m not sure which country exactly, nor am I sure of the “true” recipe. But around here, bubble tea is distinguished by the big tapioca pearls (bubbles) settled at the bottom. The drink itself is made with coffee, tea, or simply flavored milk. The first time I made bubble tea, it was literally just cold hot chocolate with tapioca! Now that we’re moving into summer, this is the perfect treat. It’s also fun to make with friends! Instead of coffee dates, why not make it a bubble tea date?

You will need:

tapioca pearls

coffee, tea, or flavour powder of your choice

milk

sugar

water

a jar, or any container with a tight lid

clear glass(es)

fat straws

IMG_20150524_142340754First, prepare your pearls. You can buy these at any Asian supermarket. (Look in the tea aisle) It doesn’t matter if you get the original black or coloured, because they taste the same. I recommend getting pearls that say “Ready in 5 minutes,” so that if you ever get a hankering, you don’t have to wait too long.

The standard ratio of pearls to water is 1:10. So for every 1 cup of pearls, boil 10 cups of water. Use your personal preferences when deciding how many pearls to make. There were only two of us and I wasn’t sure if Shoony would like them, so I only used 1/4 cup of pearls. (1/4) * 10 = 2 1/2 cups of water. Really, I just winged it boiling a small pot of water and dunking in the pearls.

If you’ve ever cooked gnocchi, this process should sound familiar. Bring the water to a boil, and then add your pearls. Stir gently for a few seconds to keep them from sticking together, and then let them simmer until they float to the top. (Timing will vary according to package directions) Scoop them out, (be careful not to overcook) and plop them into a bowl of syrup to let them cool, and to give them a bit of flavour. I used honey today, but we used a basic sugar + water syrup for Shoonie. She had a little too much fun mixin’, and a mixin’, and a mixin’…

stir

Soak the pearls in the syrup for at least 15 minutes. We ate lunch at this point. By the time we came back, uh oh… they were kinda stuck together. >_<; No worries, it was nothing a light stir couldn’t handle. If stirring doesn’t help, microwave the pearls in 5 second bursts, or until they are separated again. Also, make sure there is enough syrup to cover all of the pearls.

Today, the pearls are soaking in honey.

Today, the pearls are soaking in honey.

Meanwhile, make your tea. This was Shoonie’s first bubble tea ever, so we kept things simple with green apple flavoured milk. For a single serving I usually use 1 cup milk + 2 teaspoons powder. (Don’t forget to account for the tapioca and foam) Today I’m making cold coffee with milk. If you brewed hot, let your tea chill in the fridge. Bubble tea is best served nice and cold. coffee

Did you know bubble tea is named for the bubbles (foam) on top? Most people think it’s because the tapioca look like bubbles. That’s why this recipe isn’t just bubble tea, it’s bubble bubble bubble tea! Get it, bubbles on top? Bubbles on the bottom? And you get all bubbly from drinking it? I used the word “bubble” 3 times!

*cheep… cheep… cheep…*

To get that nice, bubbly topping, we need to shake, shake, shake! Most instant bubble tea powders only require stirring, but what fun is that? Pour your tea ingredients directly into a shaker, and go to town!

shake

Now it’s time to serve. Scoop out as many tapioca pearls as you want, and put them in a glass. (I recommend clear glasses) Then give your tea another quick shake, and pour it into the glass as well. Stick a fat straw inside, and enjoy!

Shoony likes her first bubble tea.

*If you can’t find fat straws, you can just drink the tea normally and use a spoon to scoop the pearls. Personally, it just doesn’t feel the same without a fat straw.

Verdict: Shoonie loved the bubble tea. :3 The tapioca pearls feel like gummi candies. Think I undercooked some of the pearls… nonetheless, they turned out tasty enough. To really make this a refreshing summer beverage, add crushed ice. Cubed is fine, too.

The beauty of bubble tea is that you can make it however you like. Maybe you like coffee, maybe you like tea, or maybe you just want a sweet treat. I’d like to think there’s no “right” or “wrong” way to enjoy bubble tea. Today, I made milk coffee bubble tea as a present to myself:

IMG_20150524_160309

And of course, don’t forget to pair with Shoony’s homemade bunny bite donuts.

bunnies

Nom nom nom *pom pom falls* BUNNY!!!!! DX

Anime North update: I went to Anime North yesterday, in my derpy Katara cosplay! Was too burned out to go back today. Didn’t buy anything except a candy kit for Shoony. *sigh* Such is life as a crafter: you see cute plushies and think, “I could make that myself…” Will blog about AN next weekend on the regular day, Saturday.

How do you like your bubble tea? Have you tried making it at home? What snacks do you like to eat for tea? Comment below!

Pika, so happy~

Panda Cotta! – Dessert Days #5

Those who follow my Instagram will know that I’ve been on a cooking kick lately. In other words, nobody knew that, because my account is private.

Anyway, what’s the point of cooking meals without dessert? I give you: panda cotta!

Yummy panda pudding

Yummy panda pudding

This dessert is called panna cotta. I don’t speak Italian, but I believe that means “cooked cream.” Indeed, this dessert is made using cream and milk. I’ve been meaning to try this for so long, but many lactose sensitivity tummy aches have kept it away. This is a quick and easy Mother’s Day treat as well; mi madre enjoyed it! She ate it without the chocolate sauce.

I will post a link to the video recipe at the end, so I won’t repeat it here. It’s courtesy of the very talented Laura Vitale. I found this recipe while binge watching her videos, and in the suggested videos I saw runnyrunny999’s take on this dessert. He made chocolate panna cotta, and when he took it out of the mold, chocolate flowed beautifully over the panna cotta. Oh man it looked righteous.

I like both Laura and Runny, so I figured, “por que no los dos?” (Yeah, I don’t speak Spanish either…) Unfortunately, we didn’t have any chocolate, so chocolate panna cotta will be for another day. I’m also not a fan of frozen strawberries, because they’re so sour. And so this variation, combining plain panna cotta and chocolate syrup, was born. I call it, Panda Cotta.

Let the gelatin bloom in water.

Let the gelatin bloom in water.

First, make the panna cotta. This process reminds me of the coffee jello. And coffee jello reminds me of summer days, when we spent the day out and came home for dessert. I think I will inform K of this post.

Fair warning, plain gelatin smells gross. ;w;

I didn’t have half-and-half or whole milk, so I used thick cream throughout, with a hint of skim milk to thin it out. This feels closer to Runny’s recipe, in which he used milk and cream. With thick cream, you need to stir frequently, or else it forms a skin. Don’t worry if you notice a skin forming; it’s nothing a brisk whisking can’t fix.

stirMaking panna cotta reminds me of making custard pudding. You don’t need to boil the milk, you just need to simmer it until the sugar dissolves. And the bloomed gelatin may smell funny, but it pops out pretty nicely. Kind of like a gummy candy.

I filled two dessert bowls, in order to use up as much of the cream as possible. I refrigerated these overnight with plastic wrap pressed into the surface, to make sure they were properly set.

set

Both recipes called for strawberry sauce, but I don’t really like frozen strawberries. Besides, we didn’t have any strawberries. ^_^; I do however like chocolate syrup. We had Nesquick syrup on hand, so that’s what we’ll use.

unmoldNow, all that’s left to do is unmold!

It didn’t take much to unmold the panna cotta, though you can see the edges where the knife ruined the smooth texture. They don’t transfer very well either, so make sure they land in the right spot on your first try. As expected, they feel like custard pudding, or even jello.

Time to decorate! Hm… I should’ve used the flat-bottom bowls to mold. They would’ve turned out smoother, with a flat face to pour the syrup. These portions are a little too big for one person. Next time, I’ll use the smaller, flat ramekins.

nailedit

Now just take a picture for Instagram, and we’re finished!

Final verdict:

Plain panna cotta is nice and creamy. It has the texture of jello but melts in your mouth, leaving you feeling like you just ate vanilla ice cream.As you can guess, adding the chocolate syrup tastes like vanilla ice cream with chocolate syrup. Maybe that’s why the madre ate it plain. (She prefers plain vanilla ice cream)

I think this is the Italian take on custard pudding, using gelatin instead of eggs. Again, I would make the portions smaller. This dessert is very creamy and fills you up. Not to mention I got lovely lactose sensitivity afterward. >_<

And that ends this blog. Here are the video links, as promised:

Laura Vitale’s (Laura in the Kitchen) Panna Cotta Recipe

Runny’s (runnyrunny999) Choco Panna Cotta

Anime North update: Looks like I’ll be cosplaying Katara after all. Have decided to cut my hair next year, so Oliver will come next year as well. Am going to try making an Appa plush bag to take necessities. Worst case scenario, I’ll just fit pockets on the inside of Katara’s dress. Don’t expect to spend a lot, since mainly looking for accessories and such. Heard there’s a Doll Market and was hoping to find ami eyes, but from the official site’s description it’s mainly for BJD dolls.

What other foods would you want to see “pandafied?” Comment below!

Pika, so happy~