Pie – Amigurumi #54

It’s been a week since COVID-19 sent us all into hiding. So what did I do? Run to Michael’s, stock up on supplies, and start making plushies again!

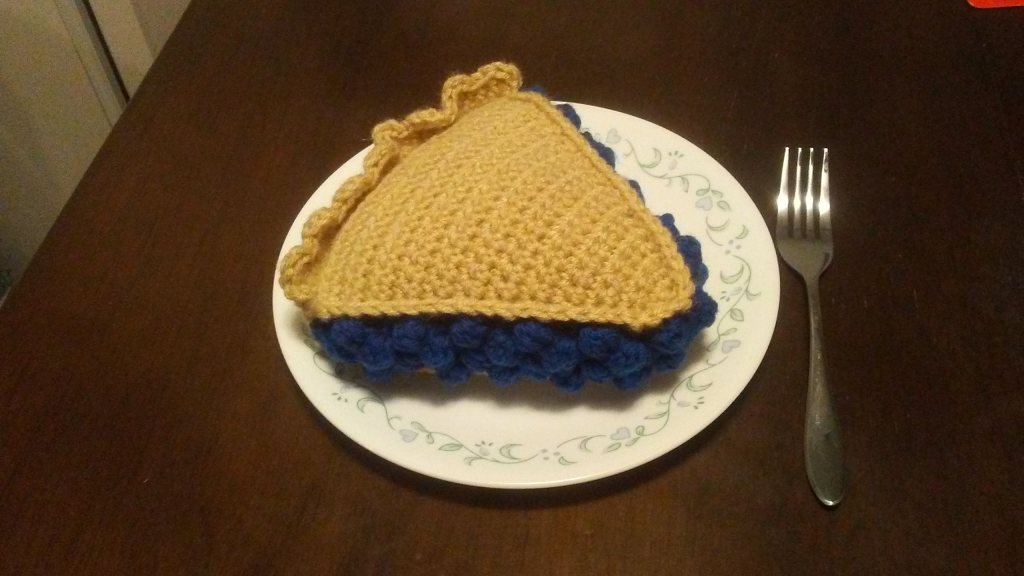
This pattern was created by Sherry Rohekar on Ravelry. The original pattern made a cherry pie, with a suggestion for blueberry pie at the end. So here we are.

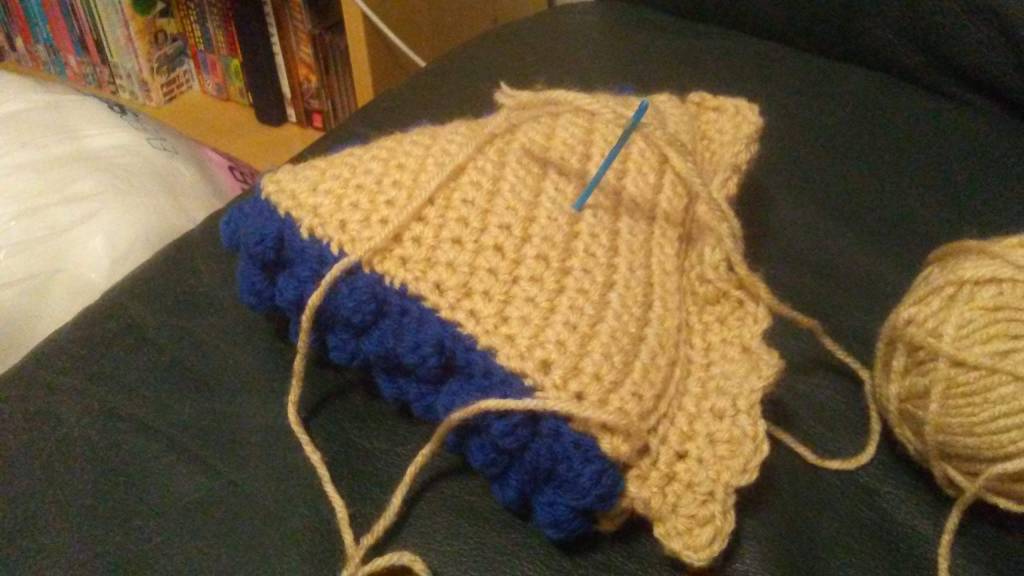
Before making the single crochet trim, the pie looked like this. On its own this isn’t too bad. If you are not confident in making the trim, you could probably get away with leaving it like this. I think the trim makes it look like the edges have been “sliced” from a whole pie, which is what you are going for. My slice ended up a little overstuffed.

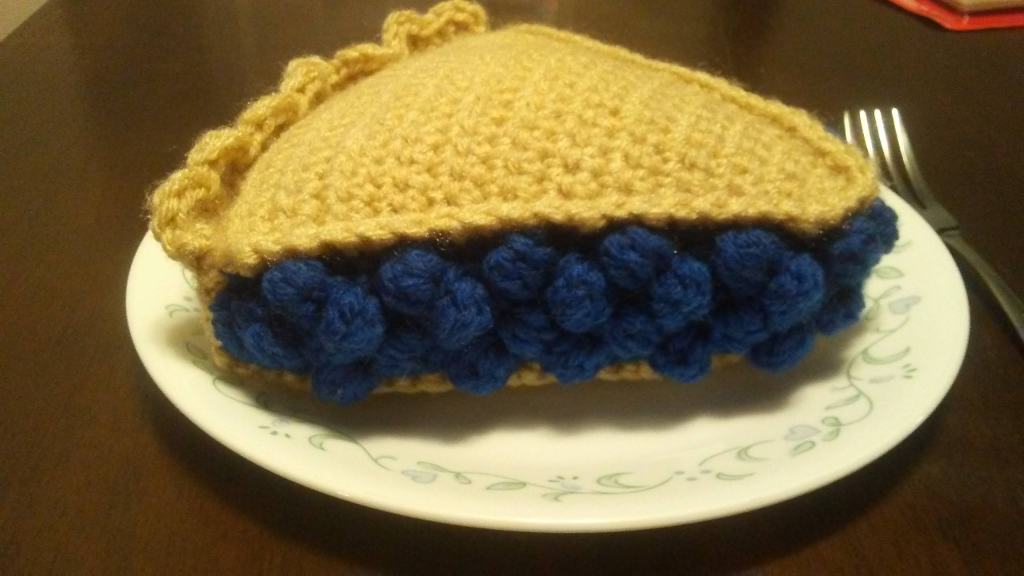
The pattern said to make bobbles “every now and then.” I tried to keep the bobbles evenly spaced each row, and it ended up looking nowhere near as interesting. Not to mention all the bunching going on… indeed, just make bobbles wherever you find enough space.

Growing up, my family was never “pie” family. We preferred cakes and cookies. I only had homemade apple pie once, before I met Hatter. Shoonie was a wee baby shoon, and we made it as a kids’ workshop project at the local apple picking farm. Having only tried the jelly-filled hand pies from McDerp’s, my mind was blown eating actual warm, baked apple pie! Maybe I’ll try making a cherry pie from scratch this summer, once cherry season kicks in.

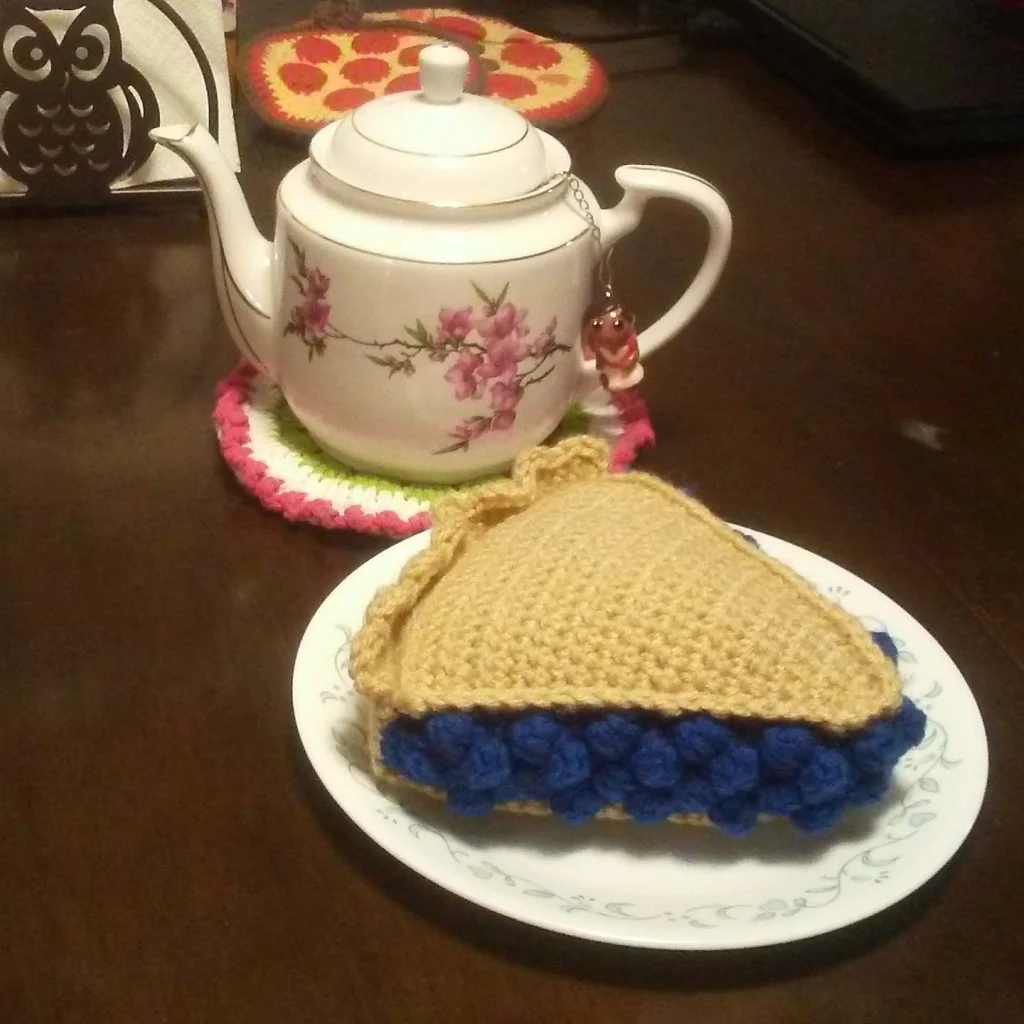
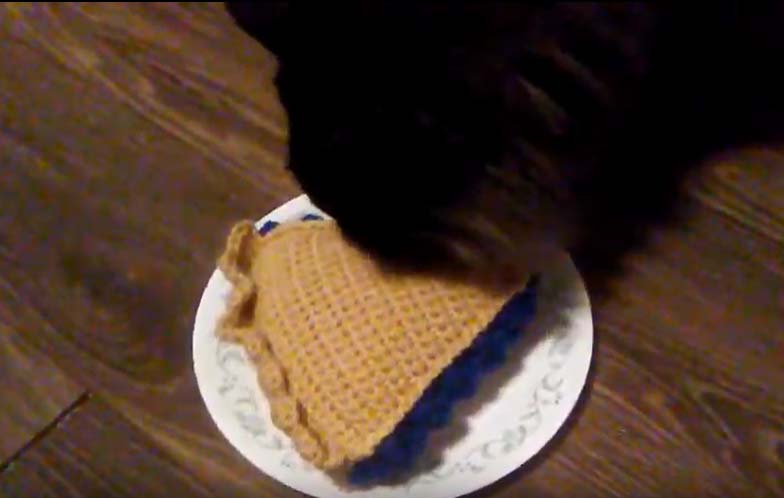
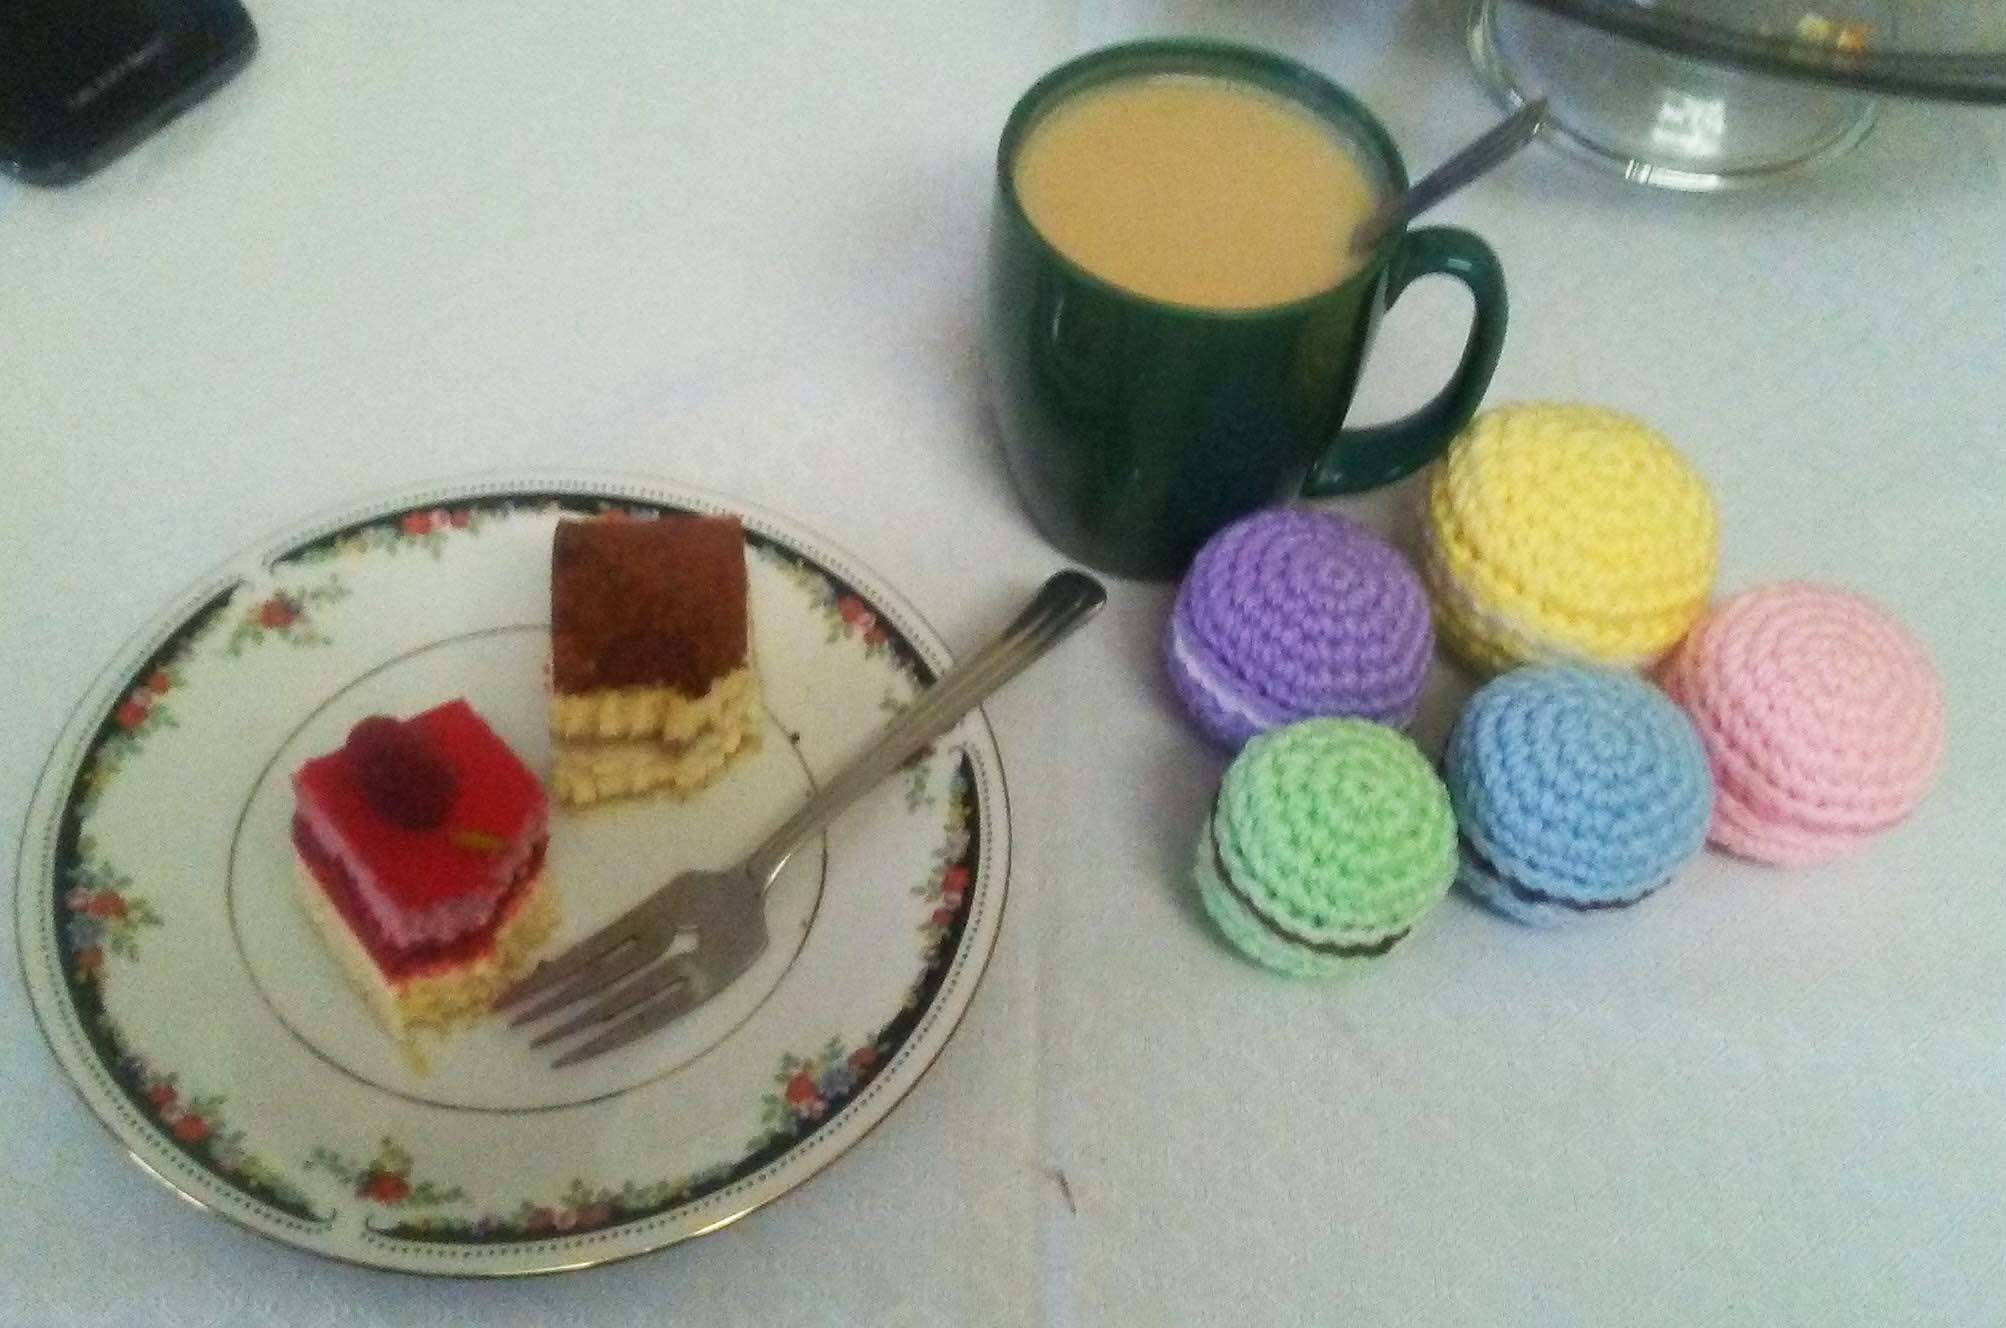
I like to eat pie with a nice cup of tea. Hatter said this pie looks cute, but tastes “pleh pleh pleh.”

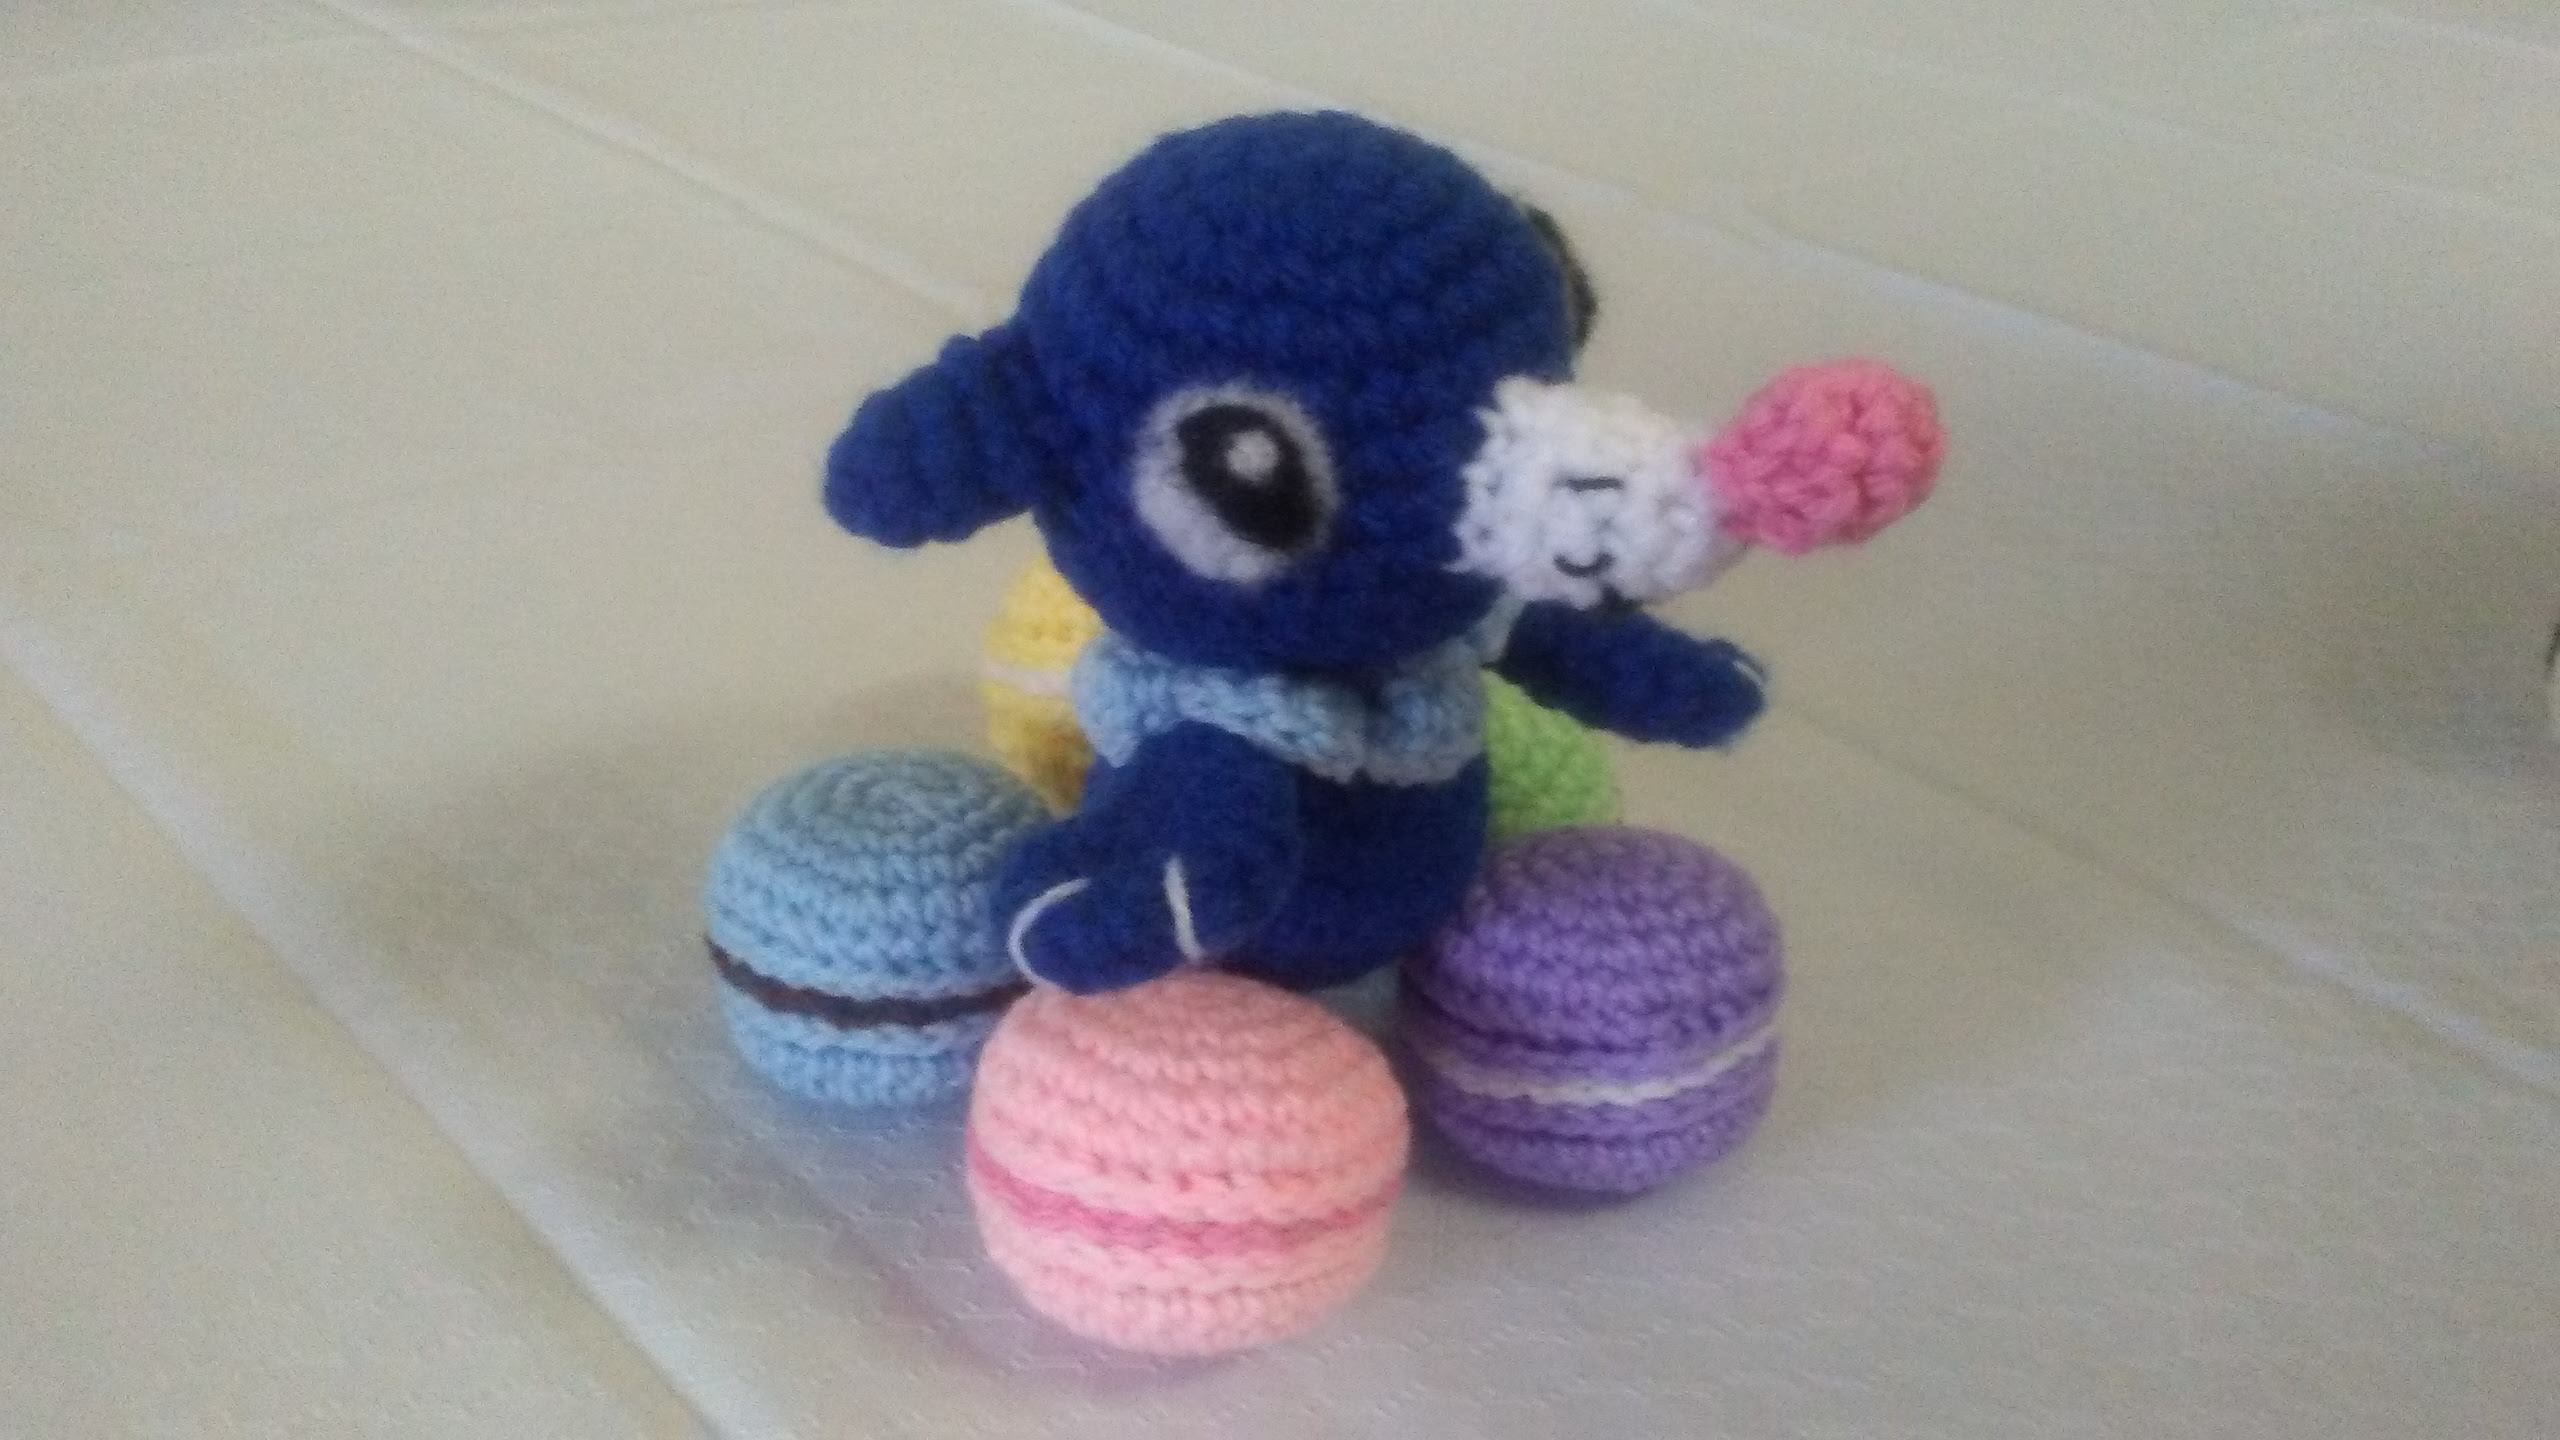
No-Face and Sootsprite liked it. As you can see they are enjoying the pie, and totally not just licking it because I put cat treats on the plate.

I meant to have this pie finished in time for Pi Day. And then we went into social isolation, which cancelled classes and due dates for this week.

Fortunately we had just enough time to have Pi Day, before isolation began. I made actual pies!

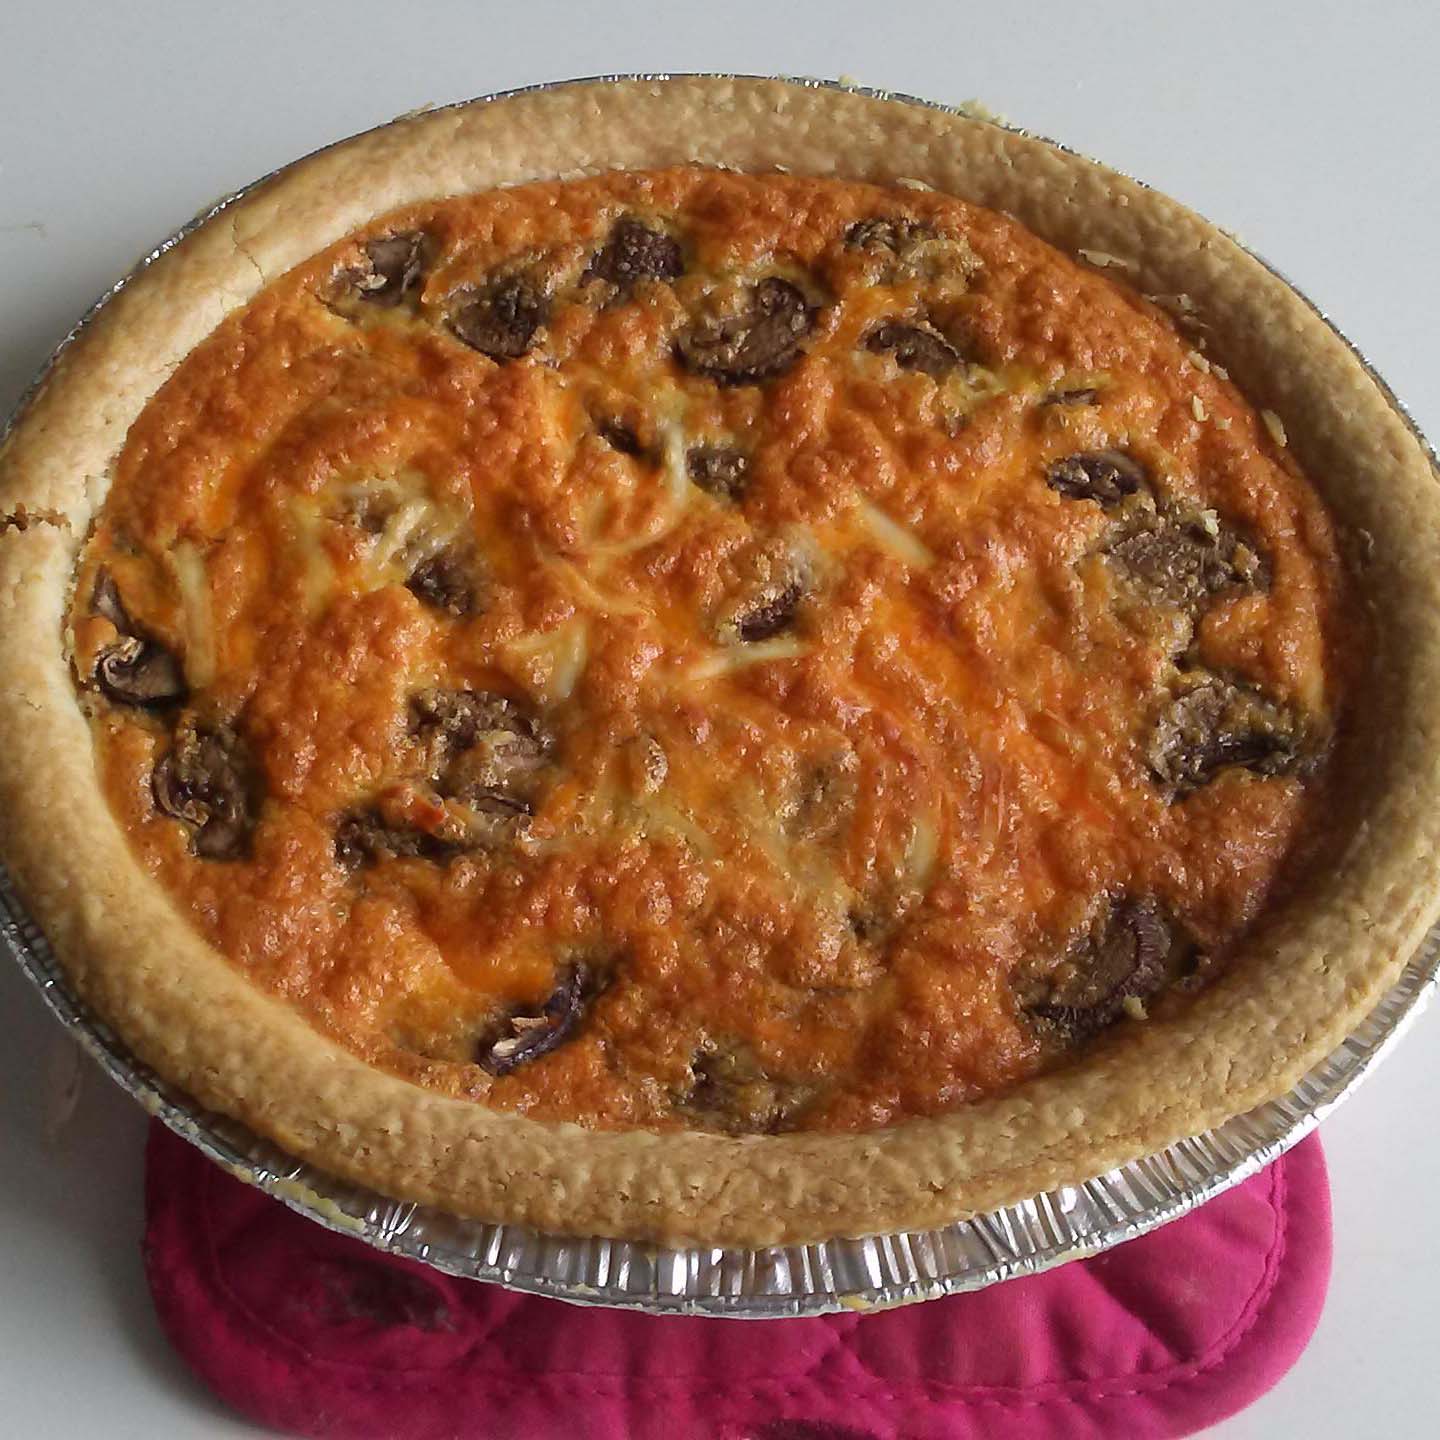
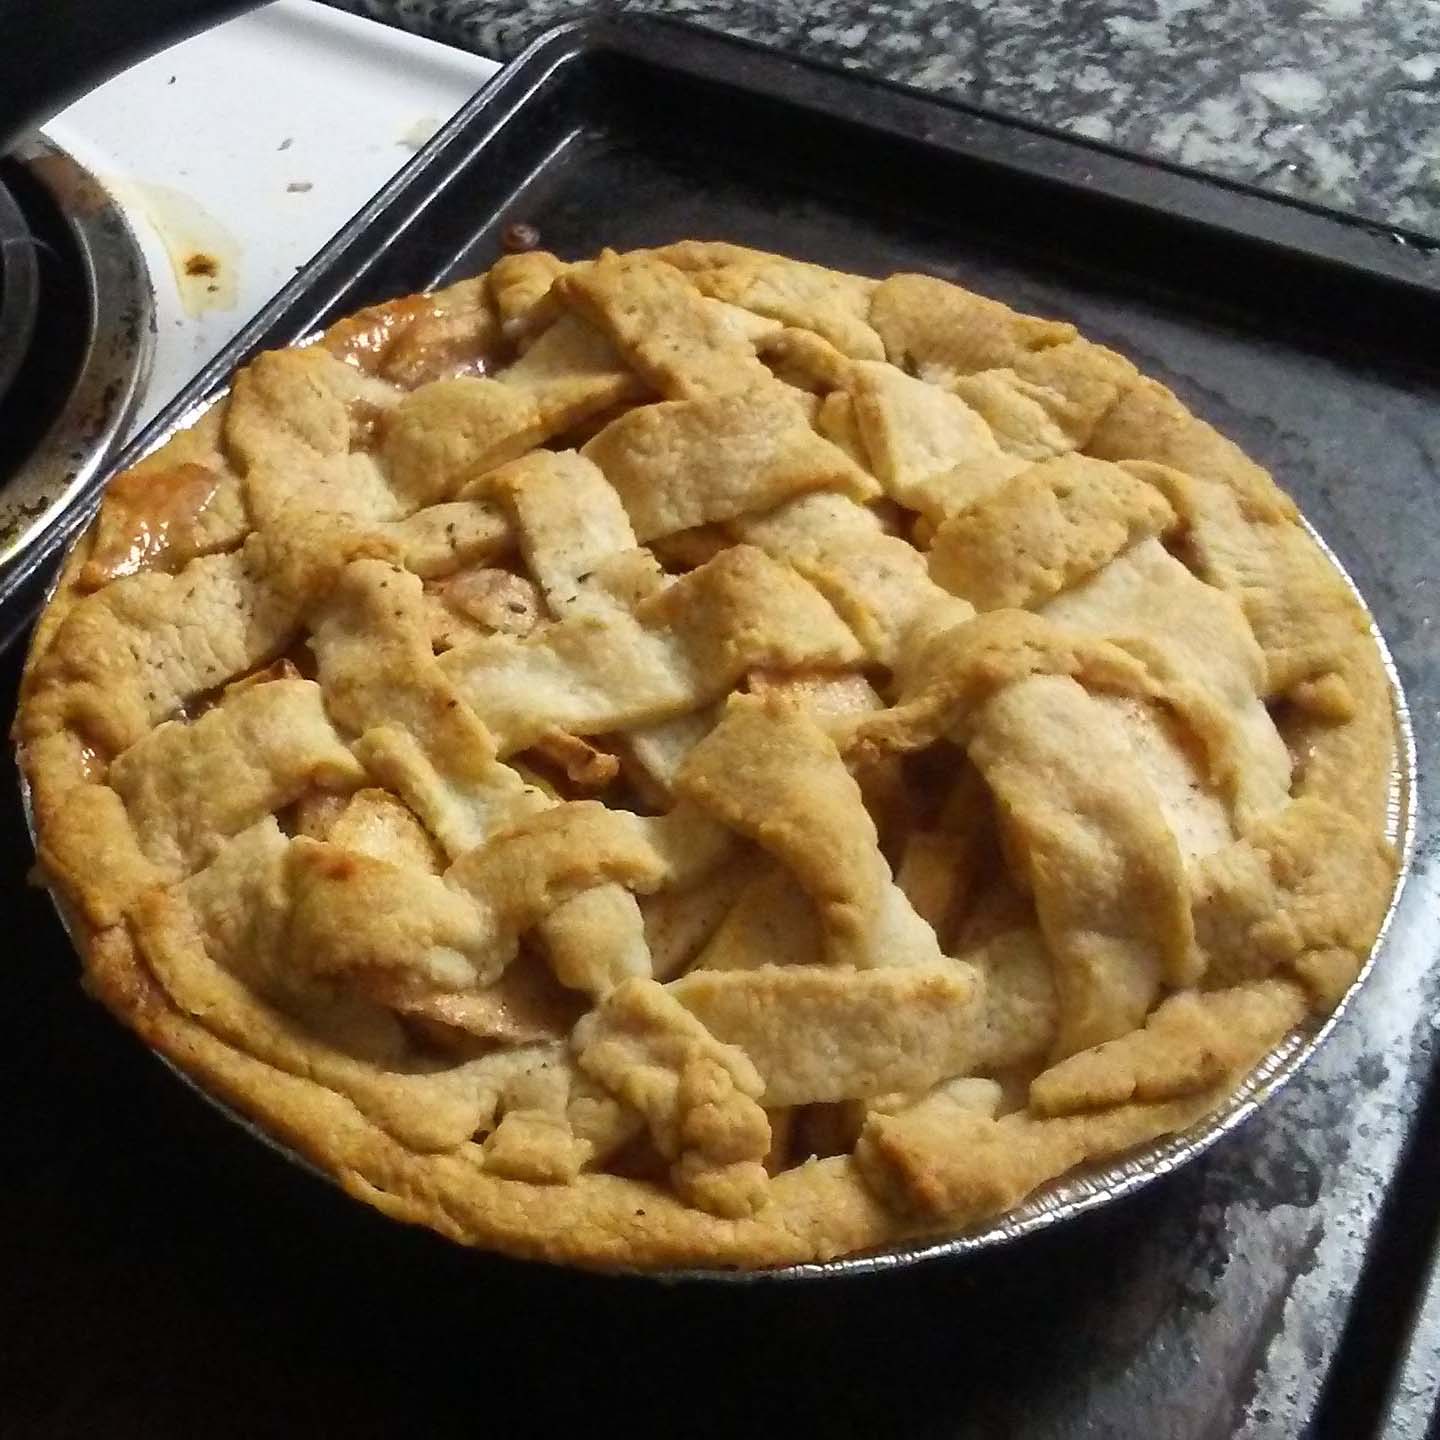
Clockwise from top left: bacon and mushroom quiche, Shepherd’s Pie, apple pie, and chocolate ganache tart. I spent all afternoon slaving away at these, but it was worth it to see so much gone by the end of the night. Some folks even took leftovers home!

The apple pie was the most intimidating because of all the apple peeling and lattice arranging. Which is why I got Hatter to do those things. šŸ˜€ I didn’t have nutmeg, so I substituted a secret ingredient. But it’s secret, so I won’t write it here. Don’t worry, rest assured it’s safe to eat. I just kept it secret from folks who might oppose it.

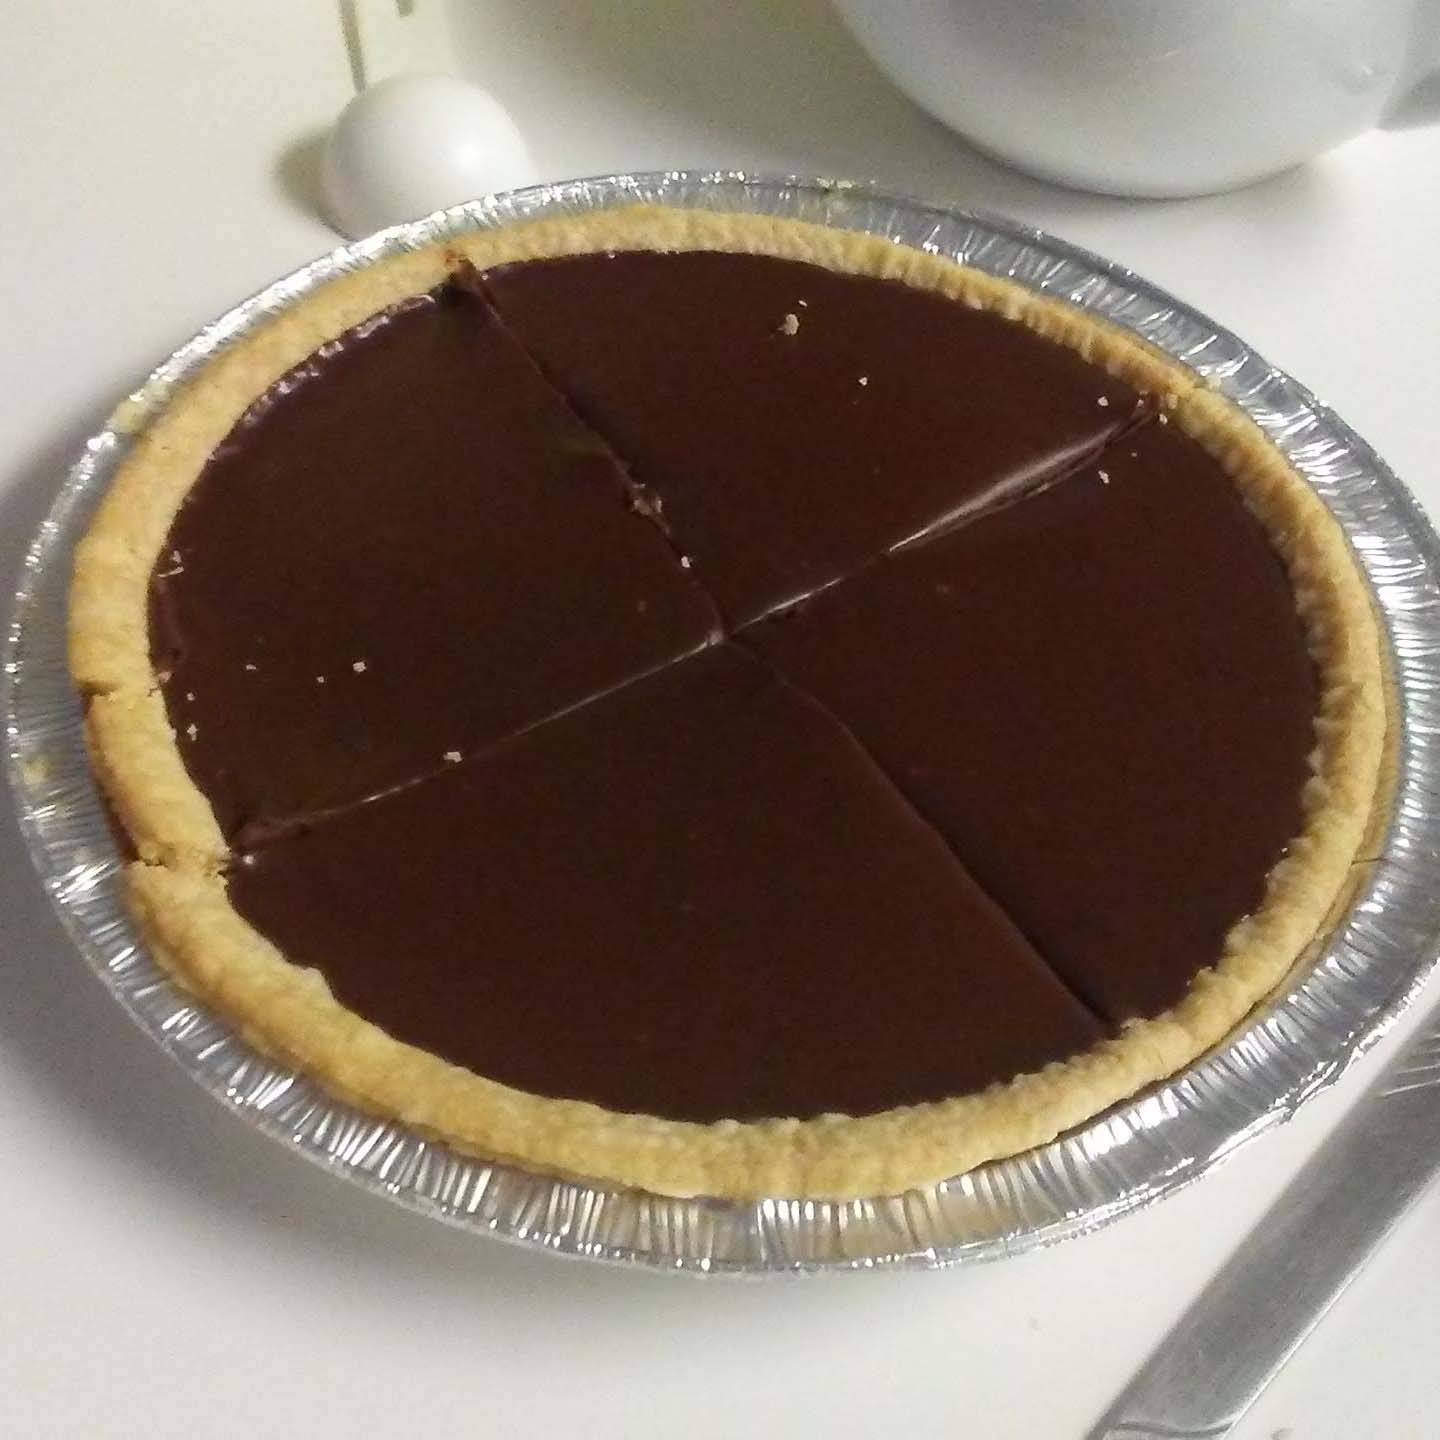
For the ganache tart, I used Chef John’s pots de creme recipe minus the coffee, poured it into the pie shell, and stuck it in the freezer for an hour. I was happy with how this turned out, because it was what I expected of a chocolate tart. Previously I made a chocolate pie, but found it too sweet and not at all like the silky, dark chocolate ganache I love. Hatter liked it, but I think a ganache tart is more of my taste. For best results, try it with a scoop of vanilla ice cream. The taste and consistency reminded me of a popular ice cream chain’s cakes.

Baking all these pies, and being able to serve guests has boosted my confidence. Next, I want to make a key lime pie; real, and crochet. Mmmm….

It sucks to be isolated. But think of it this way: now you don’t have to share your pies! Here are some links to patterns and recipes, to keep you entertained:

Cherry Pie crochet pattern by Sherry Rohekar
Quiche recipe from Sally’s Baking Addiction
*Slow cooker Shepherd’s pie from Taste of Home
Apple pie with lattice crust from the Tenderflake official website
Chocolate mocha pots de creme by Chef John

*You can make this in the oven too. I used the slow cooker to save on oven space.

What other pies do you like? Comment below!

Pika, so happy~

Macarons – Amigurumi #50

*This plush also appears on @pikainabag!

And with this blog, I complete my Lenten promise, however late it may be.

Sometimes, it is nice to let other people do things for you. Cooking for yourself is nice, but when you’re busy, it’s nice to just kick back and have someone bring you a pizza. Likewise, when you’re busy but still want to blog, it’s nice to have someone provide a pattern for you to follow.

These macarons were made using the pattern from AmigurumiPianosound. (Click name to visit YouTube channel) I was in the mood for something sweet and simple to make in a single sitting, so as to have blog material that didn’t distract from the boat load of schoolwork. And then I ended up making several.

The above picture demonstrates how varied yarns and alterations can affect the outcome of the macaron’s appearance. The mint chocolate macaron (green) was created using thing green yarn, and I skipped the “*inc, sc 3, repeat from *” round. The result was okay, but a little too round, compared to an actual macaron. I followed the pattern exactly for the pink one, but the colour combination should have been inverted, to help the cream stand out. The yarn I used for the chocolate macaron is thinner, and although it looks normal in the photo, it is a bit too thin in real life.

I like the purple and yellow macarons best. I gave the purple one to Shoonie as a belated birthday present. We promptly fed it to Little Feet, for his first birthday. Seeing as how macaron halves should have “little feet” once they are baked, it felt appropriate.

Feet not shown

And she made delicious Easter desserts!

The best one was the Shoonie hand.
I take my coffee with milk and sugar. Fight me.

You might recognize the pink macaron from the Popplio post. Indeed, Popplio likes macarons. Or are they poffins? They can’t be malasadas… malasadas are fried, and remind me of mandazis. I heard that the new gen will take place in England. Maybe macaron-like Pokemon treats will make an appearance?

Haaaa… at long last, it feels like I can breathe again. There will be another blog this weekend, along with an announcement! Until then, let’s continue to rest, recover, and make the world plush

To make your own cute macaron plush, click here for pianosound’s video tutorial.

Which dessert should be next? Did you achieve your Lenten goals? How was your Easter? Comment below!

Pika, so happy~

Cupcakes – Amigurumi #46

Who wants cupcakes? This is plushie 3/4 of my ami binge.

Or at least, it would be if I could find the original plush.Ā 

Click here to view 1/4: Pudding
Click to view 2/4: Ice Cream

At long last, I have found a cupcake pattern that works. I also figured out how to (kind of) fix the blobby-bottom problem from the pudding. It turns out, all you have to do is use an invisible join on the base. Unfortunately because of the way I stuffed it, the underside still puffs outward, but it’s nothing a bit of kneading can’t fix. And at least it doesn’t look like a baking failure.

Crocheting a flat base

I normally work in spirals when crocheting amis, but put that aside for traditional joined rounds to achieve a flat base.

It also helps to use a smaller hook when working the base. This results in a sturdier fabric.

This pink and green abomination was going to be a cupcake with swirled icing. The idea behind it was to crochet a conical cake top, and wrap the yarn around it. Somehow I thought it made sense to tie the yarn at the top of the cake, and twist it around the bottom. #pastPikaLogic

Here is the swirl-top cupcake from before, and the one I made today. This time, I just single crocheted around the top of the cupcake to simulate a blob of icing:

The new cupcake looks like a rose

Cupcakes are like people: they come in all flavours and colours, and there’s something for everyone. Chocolate cupcakes with dark chocolate frosting are indulgent, but shortcake ones with a big ol’ strawberry on top are classic. They’re all cupcakes, just different kinds of cupcakes. Some people like certain cupcakes better than others, and that’s fine. At the end of the day, just keep calm and blah blah blah you know the rest.

Can someone explain this? (Click to follow through)

The slice of cake is part of this post because I am not a cake racist. Cake slice pattern is credited to Sarah from Repeat Crafter Me. (Click the link for the pattern)

Personally, I feel that red velvet cupcakes are a bit overrated. Store bought red velvet cakes just taste like sugar and cream cheese. Does anyone out there follow Tasty? Have you noticed they’ve been posting a ton of cheesecake fusion desserts? I like cheesecake just as much as the next person, but seriously? My stomach hurts just from scrolling through Facebook.

And now if you’ll excuse me, I’m off to go look like this for a bit:

What are your favourite types of cupcakes? What other snackies do you like? Comment below!

Pika, so happy~

Octopus – Amigurumi #44

Me, last summer: “I was invited to a baby shower. What do you do at baby showers?”
Shoonie: “Uh…you give presents, play games, and pat the baby. :D”

But what if the baby isn’t born yet?

Answer: You give the mum-to-be an octopus!

Inspired by the preemie octopus, this was a present to the Mad Hatter’s other sister, Jo. She wanted a colourful octopus for baby to be, and I happened to find some rainbow “baby yarn” in my stash. I didn’t make it to the actual baby shower, so I gave it to her when I saw her prior. Jo looked very happy, and let me pat her belly. ā¤

It’s nice to finally have color on this blog.

This octopus was made with a now discontinued yarn, called Bernat Candyland. (Click the name for link) It has a boucle texture, which means it adds a bumpy texture to the finished fabric. I made a scarf using the green, white, and purple yarn, pictured on the same page.

Washed and ready to wrap!

The octopus’ legs are crocheted directly to the body, so they wouldn’t come apart once baby gets to the grabbing/pulling phase. Once I finished making the octopus, I stuffed it into an old stocking and washed it. Octopus became socktopus, and then washtopus. It’s important to wash knitted and crocheted items before giving them to a newborn. Especially if you’re using yarn that’s been sitting in storage for a long time.

And if you desire, this octopus can also be… a hat.

Please join me in wishing Baby Izzy a very warm welcome. Hello Izzy! I hope you’ve enjoyed your first 6 months on Earth! When you grow bigger I’ll make you snacks. Trust me, they’ll be even tastier than my finger!

As fate should have it, I got Jo in the Secret Santa draw. Among the other things, I gave her this birth announcement. I really just wanted to experiment colouring with colored pencils. Unfortunately I didn’t scan or take a photo of the final product, but the photo on the right is the rough draft. I’m happy that Jo is happy.

As I mentioned at the beginning, this octopus was inspired by the octopus toys made to comfort premature babies. I’m sure even non-preemies would love to have a dangly friend to cling onto. Izzy wasn’t a preemie, but she certainly enjoys her octopus! If you would like to contribute an octopus, visit the “octopus for a preemie” website or one of their Facebook pages. (Click the blue texts to follow through)

What other baby toys should appear on the blog? Do the octopus’ colors turn your cats into rock-toed pusses? Know any better octopus puns? Comment below!

Pika, so happy~

Pizza – Amigurumi #43

Benji, who’s your best friend?

Pizza?!

As part of his birthday/anniversary present, I made the Mad Hatter some trivets shaped like his favourite food. The original pattern was created by Jenni over at By Jenni Designs. (Click the name to follow)

20181028_152330.jpg

A trivet is used to protect surfaces from burning. Think of it as a coaster, but intended for things that had previously been placed directly on the burner.

This trivet turned out a lot bigger than anticipated. And I used a smaller hook, than the pattern indicated! And yet, this large trivet turned out to be the perfect size for the big pot. No-Face and Sootsprite thought the pepperonis were the perfect size to chew on. Well sucks to be them, because “mummy” isn’t going to buy them more toys until they destroy the ones they already have. Hiding them under the couch doesn’t count.

Not recommended for actual consumption

I was amazed, that these coasters turned out fairly even, and didn’t show signs of the “spiral” that amigurumi are known to create.
With the smaller trivet, I noticed the spiral pattern had returned. I’m not sure about the physics, but apparently as long as you stick to the same amount of rows, you won’t get the spiral? Pictured above is the smaller pizza, which is about 7″ in diameter.

Non-coaster pizzas also make nice hats. The following was made from my own pattern. I call this one, “PepperToni Pizza:”

The next goal is to teach the cats “who’s your best friend?”

Overall verdict: I enjoyed making this trivet. I might make a few for myself! Click here for the original pattern.

What do you like on your pizza? What other pizza crafts should come next? Who’s your best friend? Comment below!

Pika, so happy~

Tea and Gondor – DIY #11

I made a cozy for the Mad Hatter’s sister, Kate.Ā It features a cross stitch pattern of the Tree of Gondor, fromĀ Lord of the Rings.

DSC_0003DSC_0004

Click to see the video demonstration.

This cozy is part of an art exchange. Kate made me this adorable earring and necklace set. Now I can always keep the Mad Hatter close to my heart. ā¤

27783745_10159924486755203_262801415_n

Unfortunately, I don’t know much about Lord of the Rings, (I was more of a Harry Potter fan) aside fromĀ this ancient meme. I do know however, that cross stitch is not my forte. Multiple sources have tried to teach me over the years, yet the stitches never look right. That’s when Mad Hatter designed this pattern, which accounts for the chunkier floss (yarn) used in the project.

gondor

The body of the cozy was created using materials provided by Mother Top Hat. I used her cozy to make a pattern, and sewed the batting inside. The crochet cover took forever to make, but it was all worth it to see it come to completion. And I had a lot of fun cross stitching the Tree of Gondor. In the future, I might make the cover a bit tighter. I didn’t count on it becoming drapey in the wash. x_x

Mother Raichu was tickled to see a tea cozy again, after many years. Apparently, tea cozies were all the rage in the olden days. My grandmother Raichu used to cross stitch her own covers, too! Perhaps I will make a cozy for us, and decorate it with cross stitch flowers.

*yawn* As I type this, it is 1:50 AM, and I long for a cup of tea. We have just completed my first game jam with the Mad Hatter and friends. I hope to blog about our final game here soon. It shouldn’t come as a surprise, that as soon as I lamented not being creatively productive over the summer, Mad Hatter suggested this game jam. He’s always looking out for my best interest, and his cuddles warm me up like a hot cup of Forest Green. Kate is probably thinking, “my brother, cute? Eww…” XD

If you’d like to get to know Kate a bit better, you can read her blog, Peace and Pekoe. I blog about crafts while musing about life, and she blogs about life while musing about “a lot of things.” – Mad Hatter 2018

Are you a tea drinker? If so, what is your favourite kind of tea? Comment below!

Pika, so happy~


Pikachu Card Holder/Wallet – DIY #10

Pika… I’m just a Pika on a wallet.

Attach9492_20170401_164436Attach9496_20170401_164544

ShoonieĀ turned 18 on April Fool’s day. I still remember going to visit 3 days after she was born, and now she’s going to start college in a few more months. (;w;)

If there’s one thing I can recommend to a prospective college student, it’s to keep a wallet or card holder on your person at all times. (That is, if you don’t already) Along with your student ID card, you will need to carry your bus pass/driver’s license, health card, points cards, and debit card, to name a few. And as you get closer to graduation, it’s nice to create and keep a business card with your information on it, to hand out at job fairs.

This project was inspired by a Pika phone case Shoonie made for me years ago, back when I was about to graduate high school. Sadly, the case was too small for my clunky LG Neon. Said phone up and snuffed itself out about a year later. Good riddance.

Now it’s 8 years later, and both Shoonie and I have come quite a ways since our beginning years in crafts and design. I decided to make this as a tribute to how far she’s come.

The initial design for the wallet included a few slits for card holders, a clear window for a photo ID, and a pocket for cash money. Kind of like this, but with aĀ photo ID window instead of the zippered change pocket. To make the ID window, I took inspiration from one of Yumi King’s past tutorials. And you know that Rilakkuma = YASSS.

Then, I gathered the materials needed:

DSC_0380


1 sheet yellow fabric

Scraps of dark brown, red, and black fabric

White 3D paint pot

Needle and matching threads

scissors

measuring tape

seam ripper

clear ziploc bags

money and cards (for reference)

Pencil and paper


…and promptly decided that the scope was too great. As you can tell from the lighting, it was very late at night, and we had to travel to Shoon Land the next morning.Ā After much hesitation and deliberation, I decided to just duplicate my own basic cardholder.Ā The outside would be a Pika face and tail, while the inside would resemble a 3DS. I made a paper prototype:

I cut a 10 x 13 cm rectangle, and two 5.6 x 5 cm rectangles. The “dip” in the center is meant to make it easier to slide your cards in and out of the holder. The small rectangle on the right was meant to become a tail for Pika’s backside, but decided it would only cover the stripes on the back.

DSC_0402

In the end, it wasn’t as all-in-one as planned, nor did it have the fancy 3DS detail on the inside. But it does what it’s supposed to do. And look, it holds $18!

Attach9504_20170401_165156

Overall, I have quite a ways to go in terms of my felt/needlepoint skills. Attach11638_20170425_165436Luckily, the upcoming month’s project will grant plenty of time to work on that…

Watch out for this at the end of the month, along with a plushie to go with!

Have you tried making a wallet/purse before? If so, what did you use? What were the results? Comment below!

Pika, so happy~

Wrap Skirt tutorial and Valentine’s Nonsense – DIY #9

So I done goofed. This yearĀ was not my first Valentine’s Day in 3 years. It was actually my first in 4 years! And what a day it was: I went to the winter wonderland up in the countryside, where the Mad Hatter and the white rabbit were waiting. We decided to stay in, dress up, and have a home cooked dinner.

The Mad Hatter’s trademark colours are red and black, and I wanted to match his outfit. Since red is a nice Valentine’s Day colour, I chose to make a red outfit. Unfortunately, I didn’t own any red dresses, and there was no way I was going to drop $40 on a new dress I’d only wear once. I did, however, find a red t-shirt that fit fairly snug, and thought it would make a cute cutout top. How about,Ā I thought, weĀ cut the top, and make a detatchable skirt, like the one April made.

And then I started looking through videos, and found this video about a convertible skirt.Ā These skirts are similar to the infinity dress, which can be worn in many different ways. So I thought about making a similar one; it’s basically a wrap skirt that goes around twice, with a keyhole in the center of the band to accound for the extra wrap.

But then, a whole bunch of things went wrong…

  • I bought sheer ribbon, thinking it would work. It did not.
  • I found the perfect red fabric, but not the perfect complementary fabric.
  • Logo removal methods didn’t work on the shirt.


So here is the final decision on the outfit. First, we will make the skirt. Note: this is not a formal pattern. If anything, it’s an experimental blog. Now let’s dive in!

dsc_0100Materials :

Fabric of your choice

Scissors

Sewing machine

Matching thread

dsc_0102Step 1: Measure the fabric around your waist. It should be enough to wrap around twice. When in doubt, round up. Remember, it’s easier to take in a garment, than to let it out.

My measurement is about 30 inches (76 cm) around. So the minimum amount of fabric I need is 76 x 2 = 152 cm, or 1.52 m. To be on the safe side, I bought 2 meters of fabric.

dsc_0103This is where I started to fail… I bought satin. ($4/m)Ā Satin is delicate, frays easily, and shows mistakes. You can try ripping out seams, but the holes where the needle pierced it will show through. In the future, I will use jersey, or a soft knit fabric that doesn’t fray and show holes. It’s a good thing I bought extra, because a lot of the selvage ends had to beĀ sheared to remove stray fibers.

Step 2: Make the band.

Decide how wide you want your band. I want mine to be about 2.5 inches (5 cm) plus half an inch for seam allowance. So the width of the fabric I cut was (2.5 + 0.5) x 2 = (3) x 2 = 6 inches. Hooray for BEDMAS!

As for the length, I just used the length of the remaining fabric. Each cutout strap was 6″ (15.24 cm) x 2 m. You can adjust the length of the straps later.

straps

*Looking back on this project, step 4 was unnecessary. I think I meant to sandwich the top of the skirt between the two pieces, and cut it open so I could roll the hems? I don’t remember.

Step 3: Attach the skirt to the band.

Yeah. I got lazy and just sewed it on flat, as thought it were a ribbon. To ensure the skirt fit me properly, and to give it a bit more body, I made rough pleats with my fingers to gather any excess fabric. Below, I’ve pinned a ribbon, to give you an idea of where the strap was sewn. (I forgot to take a picture of this step. >_< )

dsc_0111

Step 4: make a keyhole in the center of the belt. Glue the edges of the keyhole so it doesn’t fray.

To determine where the keyhole should go, I held one end of the skirt, wrapped it around my waist once, and marked the position where the belt crossed.

Instead of hemming the skirt, I treated the raw edgesĀ with FrayCheck, to keep them from unraveling. This helps maintain the flowiness of the fabric, and saves on thread.

Finished! Sigh… Perhaps in the future I’ll revamp this skirt, into an easier-to-follow pattern. More like Fail-entine’s Day, amirite? ^_^….’_’… T_T

Here is the final product, side by side with my Mad Hatter’s dashing suit. He said it looked good, but I know I can make something better. I paired this outfit with the heart earrings from last week’s blog, and black stockings.

img_20170218_022516

Date not included. Perhaps one day, I’ll make another skirt like this.


Hm… I should’ve made this much shorter. I think I’ll refashion it into a wrap dress.

dsc_0131For the top, I took a fitted red T-shirt I no longer cared about, and cut a square neckline. Unfortunately, I couldn’t remove the logo on the front, so I ended up cutting a low back. Yikes! This low back, plus the square neckline, meant the top couldn’t stay up on its own. So instead, I opted for a technique I used in a Pikachu costume way back when, and wove a ribbon in the back. This created a cute lace-up back. I hopeĀ I’ll get more chances to wearĀ this style in the future.

I tried to curl my pigtails, but they failed miserably. Do you ever get that? Like, you’ll be putting on eyeliner and one eye will beĀ Beyonce, and the other side will be Jay-Z? Or one side of you is original, and the other side rips off jokes from iiSuperwomanii?

dsc_0164

Strawberry Rose

After getting dressed, the Mad Hatter took me by the hand, and opened the door. We sat beside each other and ate spaghetti with bacon alfredo sauce. Yes, we tried the Lady and the Tramp thing. We decided it’s best left to doggies, who can make anything look cute.

We made the fondue after we finished eating, so it would be fresh. In the past, Shoonie and I have made chocolate cups by melting chocolate, painting containers with the melted chocolate, and letting them harden. The chocolate fondue stayed nice and liquid for a long time by comparison. We dipped strawberries, marshmallows, bananas, and even bacon! The bacon was sweet and salty, aka delicious. But the bananas were still my favourite.
Spaghetti: $0.99
Butter: $2.99
Whipping Cream: $3.69
Parmesan cheese: $3.00

Chocolate Chips: $3.69
Strawberries: $2.00
Bananas: $0.59/lb x 2 = $1.18
Bacon: $5.00
Marshmallows: $3.69

Fabric: $4/m x 2 = $8.00
Ribbon: $1.25

Megabus tickets: $70

Time spent with the Mad Hatter: Priceless

The moral of the story is, you don’t need lots of money to have fun. All you need is good friends, good food, and good times. Here is my belated present to you, dear readers: an entry from this month’s 30 Day Challenge.

Day 17.JPG

How was your week? Did you celebrate Valentine’s Day? Friends’ Day? Cousins’ Day? Write midterms? How do you like to celebrate? Comment below!

Pika, so happy~

Pixel Art: Heart Earrings – DIY #8

Why wear your heart on your sleeve, when you can wear it on your ears?

img_20170212_221837

These earrings ended up looking like raspberries. So I’m calling them “raspberry hearts,” like in that one song from DDR. As you can see, they look better from a distance.

I’ve been staying in the Winter Wonderland this weekend, to spend Valentine’s day with Top Hat. We are going to stay in, dress up nice, and eat a candlelit, homecooked dinner. I’m going to wear a red dress, but couldn’t find matching accessories or jewellery. And so two nights ago, I made these with materials provided by Mother Top Hat, and earring hooks thatĀ were hiding in my bag from the Muffet earrings. Here is what I used:

dsc_0146Beading needles

Fine beading cord

Earring hooks

Pliers

This pixel heart, as a guide.Ā 

*The scissors became useless, after I learned that the pliers had built-in wire cutters.

img_20170213_111933

I started out with a length of wire that was the length of my forearm, and 5 beads to start the center chain. There must be a proper name for it, but I call it “weaving.” Basically, you string the 5 beads as normal, then use one end of the string to weave back and forth between them, creating a sturdy chain.

I personally prefer to use polyester sewing thread,Ā because it doesn’t curl back on itself as much, and it lays completely flat and doesn’t kink. Beggars can’t be choosers, of course, not to mention this cord is sturdier and doesn’t show between beads as much.

When working pixel bead art, start from the middle, and work one side at a time. This will keep you from getting confused, and causing the work to twist. It also helps if you sort out your beads ahead of time. This way you can determine which onesĀ are too tight for your needle. If they can’t handle the eye of a needle, they won’t be able to handle the bundles of cord created by weaving. I got the Mad Hatter to do this step for me… after he woke up from his couch cat nap.

dsc_0153Another thing I suggest is to work beside someone motivational. Sometimes the best way to work isn’t to work with them, but to workĀ alongside them. What I mean is, do your own thing, but do it in proximity to one another. I kept struggling and breaking beads while sitting alone. It wasn’t until the Mad Hatter finally came to sit with me, that I made progress. This is also a good way to spend time together, while still doing nothing at all… if that makes any sense.

Whether you have a date for Valentine’s Day or not, this is aĀ cute project to make. You can wear them,Ā give them to your girlfriend, or give them to your best friend tomorrow, for Friends’ Day.

To attach the hooks, I wove the remaining ends until they both stuck out of the top center. Then I just tied them to the hook, and snipped any excess cord.

Tonight, The Mad Hatter and I are going to have a nice date. I’m going to wear these earrings with a red outfit. Stay tuned this weekend, to hear about our date, and a DIY for the outfit! Meanwhile, enjoy today’s entry for the 30 day art challenge. Click the image to see the rest of this month’s submissions!

day-14

Enter a caption

Food is a universal language. Whether you have a Valentine, are just celebrating with friends, or you have exams to worry about, take time today to share a meal with someone. Meals taste better when shared.

From all of us at Pika’s Penguin Production Company, have a safe and happy Valentine’s day, and don’t forget to brush your teeth tonight!

Pika, so happy~

Pixel Art: Muffet (Undertale) – DIY #7

Blaaaargh.

Beadwork is a lot harder than it looks. Gone are the days of being five years old and simply stringing brightly coloured plastic beads onto an elastic cord. These are the days of painting 1 mm beads, (millimeter, for those outside Canada and Europe) Ā and then weaving them in such a way that they remain firm.

Top Hat requested Undertale-themed earrings for one of his nieces. And because the internet can never have too much Undertale fanart…

img_20161220_004636

muffet-gridAs usual, pixel art is easier said than done. Fortunately, Muffet is already drawn in pixels, so it was simply a matter of transliterating theĀ large image to GIMP, with a visible grid. Doing so resulted in a product that was about 36 beads long.

Well…that turned out to be waaaay too long.

img_20161218_211049167So there I was, hunched over a puddle of tiny beads and a single, flimsy beading wire, with only the soothing melody of Danny Sexbang’s vocals as company. Because the wire was a shiny gold colour, it kept getting lost, or mistaken for a stray thread. I always found it in the end, touch wood, but it was time consuming. After about an hour, this was all I had accomplished.

Let’s take a break to enjoy this amusing incident that occurred during this time.

Me: *singing aloud* “Taaaaake…onnnn….meeeee~”
Top Hat: “Take me on? :D”
Me: “Yep, it’s the NSP cover!”
Top Hat: “NSP?”
Me: “Ninja Sex Party.”
Top Hat: “…”
Me: “Lawl it’s a band.”
Top Hat: “So there are sexy ninjas playing instruments?”
Me: “Well, only one of them is a ninja.” (Ninja Brian)
Top Hat: “That’s such a lonely party!”

img_20161219_123558782Finally, I could take no more. This chintzy wire was good and fine for getting through those too-tight beads, but it was flimsy and kept getting lost. Fortunately, Mother Top Hat has lots of craft supplies. Including steel beading needles! Things went a lot faster with these needles. It was nice to sit next to Top Hat, while we worked on separate projects. Except the part where I stabbed myself in the throat with a needle, that hurt. X_X With the needles, this is what I accomplished in less than 20 minutes. Note that it’s a lot neater, as well. The trick is to work one side at a time, and finish that side before returning to the other.

At long last, I was finished. And then Top Hat pointed out, that Muffet has eight legs, not six. And this is why I ‘humphed’ at him. Which really wasn’t a good thing, because then he got more pictures of me going ‘humph.’

At this point, I was so tired and wanted to spend the last night doing something besides working. So the earrings now look like the finished product, shown above.

After posting the earrings to Facebook and Instagram, Huggie Buddy posted this in the comments. Super! Just as I said I didn’t want to look at beads for the rest of the year, all my brain could think of now was, “MAKE MORE CHARMS!”

1482428044245Upon returning home, pink beads and a pack of needles in hand, I set to work on a full-size Muffet. And here’s her progress, two days and a stiff shoulder blade later. When it’s finished, I’m going to send this to Top Hat, as a supplementary gift alongside the derpy earrings. Maybe it can be a window charm?

Next week will be the blog no one waited for: the time capsule! I don’t remember what I wrote in it, but hopefully I stuck to at least half of those resolutions.

From all of us at Val’s Crafts, Pika Plushies, Pika’s Penguin Production Company, and so on so forth… Merry Christmas, and a Happy New Year 2017!

Pika, so happy~